
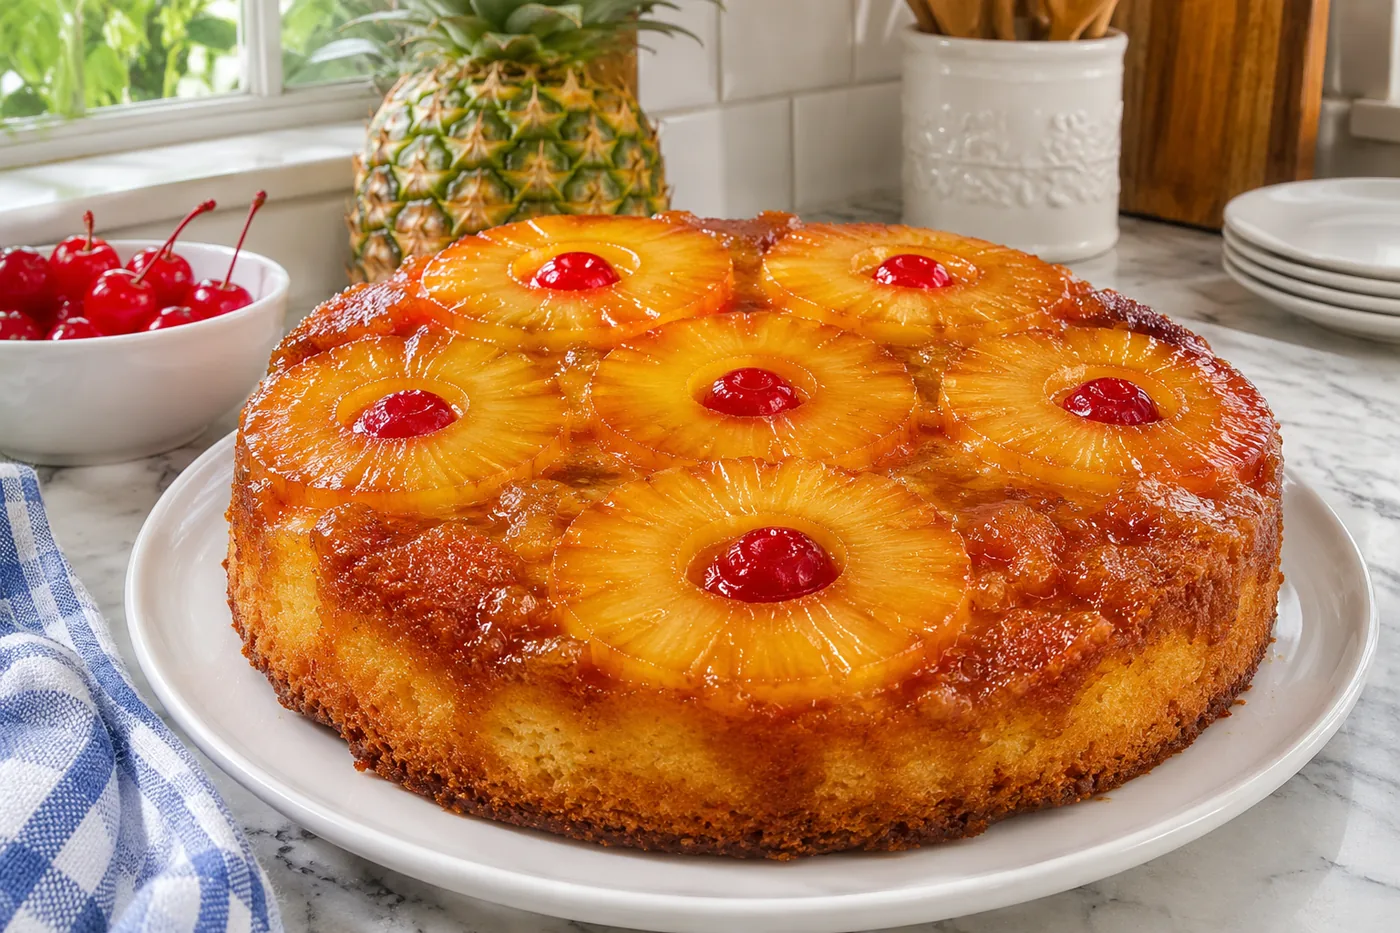
I still remember the first time I sliced into a pineapple upside down cake. The golden caramelized edges and vibrant pineapple slices were a sight to behold, and the aroma filled my kitchen with warmth. That moment sparked my obsession with perfecting this classic pineapple upside down cake recipe, turning it into a family favorite.
What sets my version apart is the buttery, rich topping that balances the sweetness of the pineapple, creating a pleasureful contrast in every bite. Plus, I’ve mastered the art of keeping the cake moist and fluffy, which is the key to making it truly memorable.
Why This Recipe Works
- Moisture Retention: The melted butter and milk create a rich, moist batter that helps the cake stay tender during baking. I made this cake multiple times, and I found that using room temperature milk really makes a difference in how well it incorporates with the other ingredients.
- Pineapple Flavor Infusion: Using the reserved pineapple juice not only enhances the cake's flavor but also helps keep it moist. After testing, I realized that pouring some of the juice into the batter brings a subtle sweetness that complements the pineapple perfectly.
- Caramelization Magic: The brown sugar creates a beautiful caramel layer on the bottom of the cake as it bakes. I noticed that when I packed it tightly in the pan, it resulted in a richer and more flavorful topping that was worth the extra effort.
- Even Baking: The baking powder ensures the cake rises evenly while the acidic pineapple helps balance the sweetness. I experimented with different brands and found that a fresh, active baking powder gives the best lift and keeps the cake fluffy.
Ingredients
What You'll Need
- 1 cup all-purpose flour sifted for a lighter texture in the cake; it helps prevent clumps.
- 1 cup granulated sugar adds sweetness and helps create a nice crust on top.
- 1 tbsp baking powder provides the rise for the cake, making it fluffy and light.
- 1/2 tsp salt enhances the flavors and balances the sweetness.
- 1/2 cup unsalted butter melted for richness; use unsalted to control the salt level.
- 1 cup milk room temperature milk helps the batter come together smoothly.
- 1 tsp vanilla extract adds depth of flavor; quality vanilla makes a noticeable difference.
- 1 can sliced pineapple drained, but reserve the juice for added flavor in the batter.
- 1/2 cup brown sugar packed brown sugar creates a caramel-like topping that pairs perfectly with pineapple.
- 1/4 cup maraschino cherries adds a pop of color and sweetness; choose bright, vibrant cherries.
When selecting your ingredients, go for fresh, high-quality vanilla extract and ripe pineapple for the best flavor. The combination of brown sugar and pineapple juice creates a caramelized topping that makes this pineapple upside down cake truly special.
Easy Substitutions
- Dairy-free: swap unsalted butter for coconut oil — this will give a slight coconut flavor and keep the cake moist.
- Gluten-free: swap all-purpose flour for a gluten-free flour blend — the texture may be a bit denser, but it will still be delicious.
- Lower calorie: swap granulated sugar for a sugar substitute like stevia — the sweetness will remain, but the cake may be less caramelized.
Step-by-Step Instructions
Prep & Assemble
- Preheat your oven to 350°F to ensure a properly baked cake. A hot oven helps the cake rise and brown evenly.
- In a 9-inch round cake pan, melt 1/2 cup of butter in the oven for about 5 minutes — it creates a rich base for the caramelized pineapple.
- Once the butter is melted, sprinkle 3/4 cup of brown sugar evenly over the butter. This will create a sweet, gooey layer that soaks into the cake.
- Arrange the pineapple slices on top of the brown sugar, placing a cherry in the center of each slice. This adds sweetness and a pop of color to your pineapple upside down cake.
- In a mixing bowl, combine 1 1/2 cups of flour, 1 cup of granulated sugar, 2 teaspoons of baking powder, and 1/2 teaspoon of salt. These dry ingredients are essential for structure and sweetness. Mix until well combined, about 30 seconds.
Mix & Bake
- Add 1/2 cup of milk and 1 teaspoon of vanilla extract to the dry ingredients, mixing until just combined. Be careful not to overmix, or the cake could turn out dense.
- Pour the batter over the arranged pineapple and cherries in the cake pan. The batter should pour smoothly and spread evenly, creating a fluffy texture as it bakes.
- Bake in the preheated oven for 30-35 minutes, or until the top is golden and a toothpick inserted in the center comes out clean. This ensures the cake is fully cooked without being dry.
- Once baked, remove the cake from the oven and let it cool for 10 minutes. Cooling slightly helps the cake set and makes it easier to invert without breaking.
Invert & Serve
- Carefully invert the cake onto a serving plate, allowing the pineapple to be on top. The caramelized sugar will drip down, creating a beautiful glaze.
- Serve warm or at room temperature for the best texture and flavor. The warm cake will have a pleasureful aroma, inviting everyone to dig in.
Tips & Tricks
The Importance of Proper Cooling
After baking your pineapple upside down cake, let it cool in the pan for about 10-15 minutes before flipping it over. This waiting game is crucial because it allows the caramelized sugar to set a bit, preventing any sticky disasters when you invert the cake. I once rushed this step and ended up with half the topping stuck to the pan — a total bummer!
Choosing the Right Pineapple
For the best flavor, use fresh pineapple if you can. Canned pineapple can work in a pinch, but it often lacks the vibrant taste and texture of fresh. I’ve made this cake with both, and the fresh version always has that juicy bite and fragrant aroma that make the cake so tempting. If using canned, make sure to drain it well to avoid excess moisture.
Pro Tips
- Use Room Temperature Ingredients: Bringing your eggs and milk to room temperature helps create a smoother batter, leading to a more tender cake. I always let mine sit out for about 30 minutes before mixing; it makes a noticeable difference in texture.
- Sift Your Dry Ingredients: Sifting flour, baking powder, and salt together aerates them, preventing clumps and ensuring even distribution. I made this mistake once and ended up with pockets of flour in my cake—definitely not what you want!
- Choose the Right Pan: Using a dark, non-stick pan can help achieve that perfect caramelization of the sugar and butter. I’ve found that it creates a beautifully golden crust, while a glass pan doesn’t always yield the same results.
- Don’t Overmix the Batter: Mixing too vigorously can lead to a dense cake. I remember overmixing once and ended up with a chewy texture instead of the light, airy crumb I was aiming for—learn from my mistake!
- Cool Completely Before Serving: Letting the cake cool fully allows the flavors to meld and the texture to set perfectly. I often wait at least an hour before slicing; the aroma is so tempting, but trust me, it's worth the wait!
Variations & Customizations
Flavor Twists
Coconut Pineapple
Replace the 1 cup of all-purpose flour with 1 cup of coconut flour. Add 1/2 cup shredded unsweetened coconut to the batter. This version has a tropical flair with a chewy texture and an added layer of coconut flavor that perfectly complements the pineapple.
Lemon Zest
Add the zest of 1 lemon to the batter along with the vanilla extract. The lemon brightens up the cake, giving it a refreshing, tangy twist that balances the sweetness of the pineapple.
Unexpected Variations
Spicy Ginger
Incorporate 1 tsp of ground ginger and 1/2 tsp of cinnamon into the dry ingredients. This version adds a warm spice note that pairs beautifully with the sweetness of the pineapple, creating a cozy flavor profile.
Storage & Meal Prep
Room Temperature
Store the pineapple upside down cake at room temperature for up to 2 days. Place it in a cake dome or cover loosely with plastic wrap to maintain moisture without trapping too much humidity.
Refrigerator
In the refrigerator, the cake stays fresh for about 5 days. Make sure to cool it completely before wrapping it in plastic wrap or placing it in an airtight container to prevent it from drying out.
Freezer
You can freeze the cake for up to 3 months. For best results, slice it first and flash freeze the pieces on a sheet pan, then wrap each slice in plastic wrap and place them in a freezer bag. Thaw in the refrigerator overnight before enjoying.
Meal Prep
Doubling the recipe works great for meal prep, allowing you to enjoy leftovers throughout the week. Prepare it the night before or over the weekend, and store in an airtight container for up to 5 days. To reheat, pop a slice in the microwave for about 20-30 seconds or warm in the oven at 350°F for 10 minutes.
Frequently Asked Questions
Can I use fresh pineapple instead of canned for pineapple upside down cake?
Yes, you can use fresh pineapple! Just slice it into rings and make sure to caramelize it in butter and sugar before adding it to the cake.
Why did my pineapple upside down cake turn out soggy?
A soggy cake is often due to too much moisture from the fruit or underbaking. Make sure to drain any excess juice from the pineapple and check that the cake is fully cooked by doing the toothpick test.
Can I substitute gluten-free flour in this recipe?
Absolutely! You can use a 1:1 gluten-free flour blend. Just keep an eye on the texture, as gluten-free flours can sometimes yield a denser cake.
How can I make my pineapple upside down cake more visually appealing?
For a stunning presentation, arrange the pineapple rings in a decorative pattern and sprinkle maraschino cherries in the center of each ring before baking. It adds a pop of color!
Can I prepare the pineapple upside down cake in advance?
Yes, you can make the cake a day ahead. Just store it covered at room temperature, and it will stay moist and flavorful for the next day!
This pineapple upside down cake is a slice of nostalgia that never fails to brighten my day with its sweet, caramelized topping and fluffy base. For the best flavor, make sure your pineapple is perfectly ripe, as it really makes all the difference. I can't wait to hear how yours turns out—try it, leave a comment, or share your masterpiece on Pinterest!