
If you’re searching for the ultimate comfort dessert, look no further than this Banana Pudding recipe. Creamy, velvety, and layered with soft bananas, vanilla wafers, and a rich pudding mixture, this dessert is perfect for family gatherings, potlucks, or simply indulging in a sweet treat at home.
With easy-to-find ingredients and simple steps, even beginner bakers can create a dessert that tastes like it came straight from a bakery. The combination of pudding, cream cheese, whipped topping, and crunchy wafers ensures every bite is decadent and satisfying.
Why You’ll Love This Recipe
- Classic Flavor: The combination of vanilla pudding, bananas, and wafers creates a timeless Southern dessert.
- Rich and Creamy: Cream cheese and whipped topping make the pudding silky and indulgent.
- Easy and Quick: Requires no baking, just assembly, making it a stress-free dessert.
- Family-Friendly: Loved by kids and adults alike, perfect for parties or holiday gatherings.
About the Ingredients
Vanilla Wafers
Provide a crunchy base and topping, adding texture to every bite.
Bananas
Fresh bananas create natural sweetness and a creamy layer.
Milk
Used to prepare the pudding, adding richness and smooth consistency.
French Vanilla Pudding Mix
Adds a classic vanilla flavor and thickens the mixture.
Cream Cheese
Gives the pudding a velvety, rich texture.
Sweetened Condensed Milk
Adds sweetness and creaminess.
Frozen Whipped Topping
Lightens the mixture and adds fluffiness.
Tips & Tricks
Choose the Right Bananas
Use slightly underripe bananas to avoid browning and maintain firm texture.
Layer Just Before Serving
To prevent soggy wafers, layer cookies and bananas just before serving if making ahead.
Chill for Best Flavor
Chill for at least 2 hours, but overnight refrigeration enhances the flavor.
Pro Tips
- For an extra decadent touch, sprinkle cinnamon or crushed wafer crumbs on top.
- Fold whipped topping gently to preserve its light, airy texture.
- Use an electric mixer for smooth, lump-free pudding.
Step-by-Step Instructions
Prepare the Base Layer
Line the bottom of a 13x9-inch dish with one box of vanilla wafers. Arrange sliced bananas evenly on top of the cookies to form the base layer.
Mix the Pudding
In a mixing bowl, combine milk and French Vanilla pudding mix. Use a handheld electric mixer to blend until smooth and thickened. Set aside.
Create the Cream Mixture
In a separate bowl, beat together cream cheese and sweetened condensed milk until smooth and creamy.
Combine and Layer
Gently fold the whipped topping into the cream cheese mixture. Then, stir this mixture into the prepared pudding until fully combined.
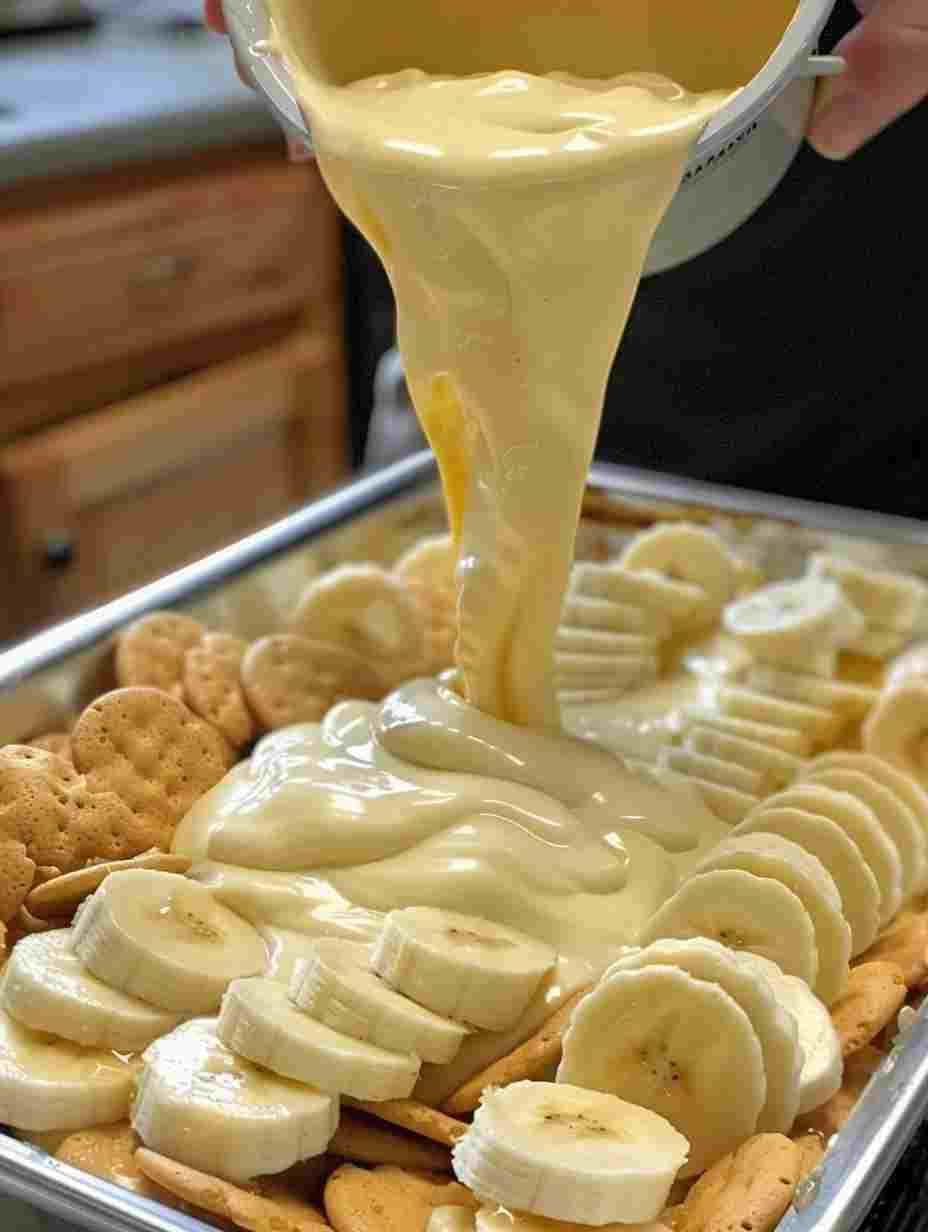
Assemble the Pudding
Pour the creamy mixture over the cookie and banana layer, spreading evenly. Top with the second box of vanilla wafers for a crunchy topping.
Chill and Serve
Refrigerate for 2–4 hours, allowing flavors to meld and the pudding to set. Serve chilled and enjoy!
Delicious Variations
Chocolate Banana Pudding
Add a layer of chocolate pudding or sprinkle chocolate chips between layers for a rich twist.
Caramel Banana Pudding
Drizzle caramel sauce over each layer for a sweet, buttery twist.
Mini Banana Puddings
Assemble in individual cups or jars for easy serving and portion control.
How to Store The Best Banana Pudding Ever
Refrigerator
Store in an airtight container for up to 3 days.
Freezer
Do not freeze as it may alter the texture of bananas and pudding.
Room Temperature
Best served chilled; avoid leaving out for extended periods.
Reheating
Enjoy cold; avoid reheating to maintain texture.
Frequently Asked Questions
Can I use instant pudding instead of boxed French Vanilla pudding?
Yes. Instant pudding works well and reduces chilling time slightly.
Can I use Greek yogurt instead of cream cheese?
Yes, Greek yogurt adds tang and reduces fat, but the pudding will be slightly less rich.
Can I use plant-based milk?
Absolutely. Almond, oat, or soy milk can replace cow’s milk for a dairy-free version.
Can I make this gluten-free?
Yes. Use gluten-free vanilla wafers instead of regular wafers.
Can I make this ahead of time?
Yes, you can prepare it up to 24 hours in advance for convenient entertaining.