
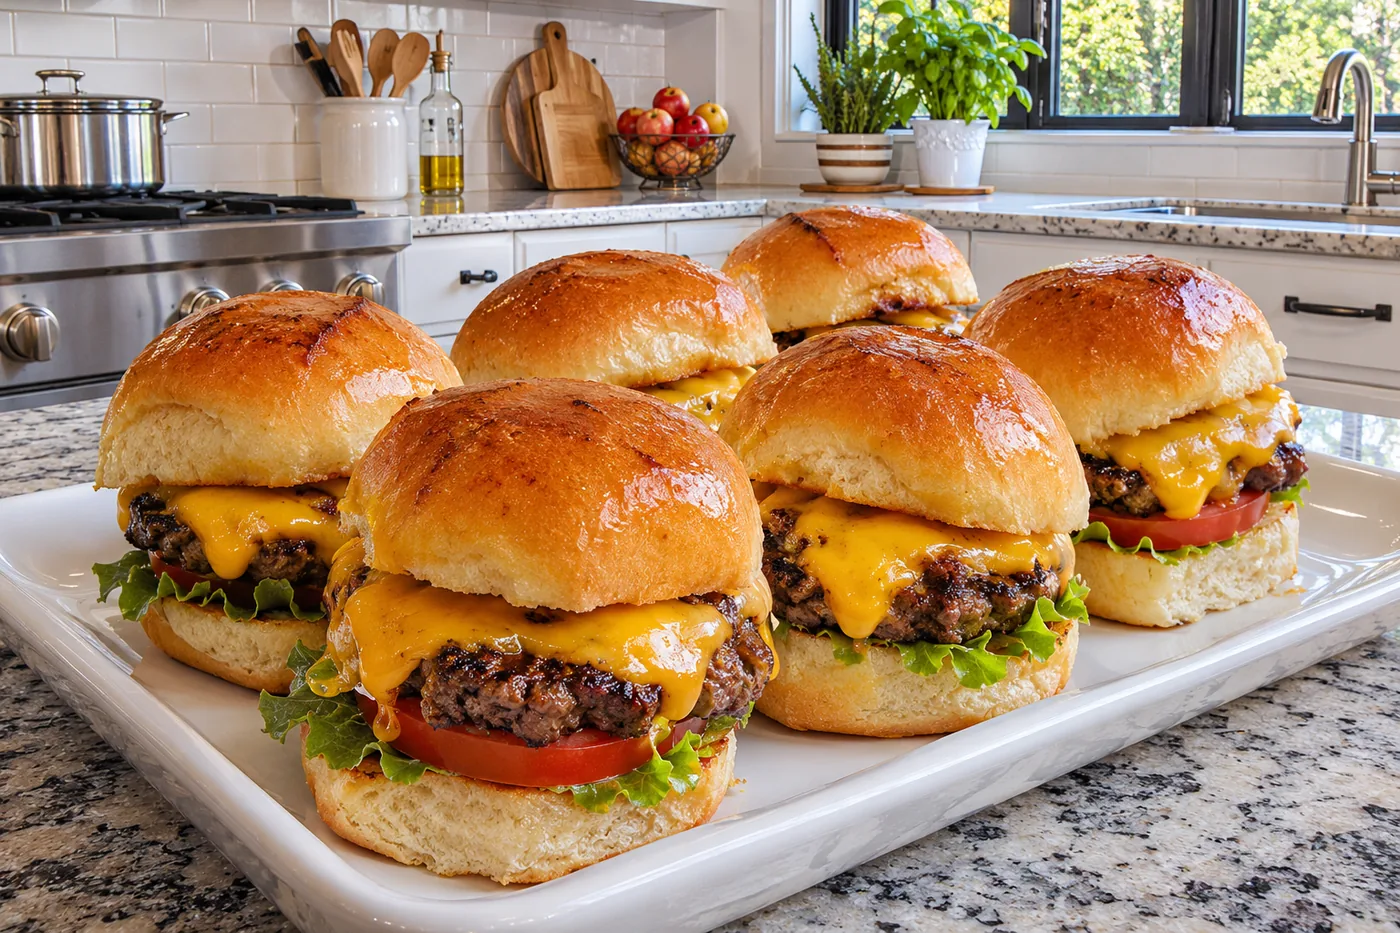
I remember the first time I made cheeseburger sliders for a family gathering. The excitement in the air was palpable as those little bites of juicy goodness disappeared in seconds, leaving everyone craving more.
What sets this recipe apart is the perfect blend of savory cheddar, fresh toppings, and a secret seasoning mix that enhances the flavor profile to a whole new level. You won't find these sliders just anywhere!
Why This Recipe Works
- Juicy Blend: Using an 80/20 blend of ground beef ensures the sliders stay juicy and flavorful. The higher fat content helps retain moisture during cooking, preventing dry patties.
- Seasoning Balance: The combination of garlic powder and onion powder enhances the beef's natural flavor without overpowering it. These seasonings create a savory aroma that makes your mouth water before you even take a bite.
- Cheddar Melt: Slicing the cheddar cheese thinly allows it to melt evenly over the patties. This not only creates a deliciously gooey texture but also enhances the overall cheeseburger experience.
- Soft Buns: Opting for soft slider rolls is key to achieving the perfect bite. The texture of the buns complements the juicy patties, creating a pleasureful contrast that enhances each slider.
Ingredients
What You'll Need
- 1.5 lb ground beef 80/20 blend for juiciness; this fat content keeps the sliders moist and flavorful.
- 1 tsp salt to taste; enhances the overall flavor.
- 1 tsp black pepper to taste; adds a nice kick.
- 1 tbsp garlic powder for a savory depth; fresh garlic can also work if you prefer.
- 1 tbsp onion powder adds sweetness and flavor; it blends well with the beef.
- 8 slices cheddar cheese sliced; choose a sharp cheddar for a more robust flavor.
- 12 slider rolls mini hamburger buns, preferably soft; they should be easy to bite into.
- 1 cup shredded lettuce for topping; adds crunch and freshness.
- 1 cup sliced tomatoes fresh; juicy tomatoes enhance the slider's flavor.
- 1/2 cup ketchup for serving; classic condiment that adds sweetness.
- 1/2 cup mustard for serving; brings a tangy contrast.
- 1 tbsp olive oil for cooking; helps keep the beef from sticking to the pan.
When buying ground beef for these cheeseburger sliders, look for a bright red color and a good amount of marbling. Fresh ingredients like lettuce and tomatoes will make a huge difference in flavor and texture, so choose the freshest options you can find.
Easy Substitutions
- Dairy-free: swap cheddar cheese for dairy-free cheese — the flavor changes to a bit milder, and the texture may be less creamy.
- Gluten-free: swap slider rolls for gluten-free buns — they might be denser, affecting the overall texture but still delicious.
- Lower calorie: swap ground beef for lean ground turkey — this will make the sliders lighter, though they may lack some richness.
Step-by-Step Instructions
Prep & Mix
- Preheat a large skillet over medium-high heat for about 3 minutes — this ensures a nice sear on the patties, which adds great flavor and texture.
- In a large bowl, combine ground beef, salt, black pepper, garlic powder, and onion powder. Mix gently until just combined — overmixing can lead to tough sliders, and we want them tender and juicy.
- Form the mixture into 12 equal-sized patties, about 1/2 inch thick. Keeping them uniform in size helps them cook evenly, so you avoid any undercooked or overcooked sliders.
Cook & Assemble
- Add 1 tablespoon of olive oil to the preheated skillet, then carefully add the patties. Cook for 3-4 minutes on each side until they are browned and the internal temperature reaches 160°F — that beautiful brown crust adds flavor and keeps the juices in.
- In the last minute of cooking, place a slice of cheddar cheese on each patty. Cover the skillet with a lid to help melt the cheese quickly — this will create that gooey, melty goodness we all love on cheeseburger sliders.
- While the patties rest for about 2 minutes, slice the slider buns in half. This allows the buns to absorb some of the flavors from the patties without becoming too soggy.
- Assemble the sliders by placing a patty on the bottom half of each bun, then topping each with shredded lettuce and sliced tomatoes for a fresh crunch.
- Spread ketchup and mustard on the top half of the bun and place it on the assembled sliders. This adds layers of flavor and moisture, bringing everything together beautifully.
- Serve the cheeseburger sliders immediately while warm — they’re best enjoyed fresh off the skillet, with all those delicious flavors intact.
Tips & Tricks
The Importance of Resting the Patties
After cooking your cheeseburger sliders, let the patties rest for a couple of minutes before serving. This simple step allows the juices to redistribute throughout the meat, making each bite more flavorful and juicy. I’ve made the mistake of serving them immediately, leading to dry sliders that just didn’t hit the spot.
Choosing the Right Cheese
While cheddar is a classic choice for cheeseburger sliders, experimenting with different cheeses can enhance your sliders to a whole new level. I love using pepper jack for a little heat or even blue cheese for a bold flavor. Just remember to slice the cheese thinly and place it on the patties during the last minute of cooking to achieve that perfect melt.
Pro Tips
- Chill Patties Before Cooking: Chilling your patties for about 30 minutes before cooking helps them hold their shape better on the grill or skillet. I learned this the hard way when my first batch fell apart. It also helps the flavors meld together.
- Use a Burger Press: A burger press can help you achieve uniform patties, ensuring consistent cooking. I find that a well-formed patty not only cooks evenly but also makes for a more visually appealing slider. Plus, it's a fun tool to have!
- Toast the Slider Buns: Lightly toasting the slider buns adds a tempting crunch and prevents them from getting soggy. I use a bit of butter and toast them in the same skillet after the patties are done. The aroma is wonderful!
- Add Seasoning to the Buns: Sprinkling a little garlic powder or onion powder on the toasted buns can enhance your sliders. It’s a great choice for flavor that most people overlook. Trust me, it adds a subtle depth that pairs beautifully with the beef.
- Try Different Ground Meats: Experimenting with different ground meats can create unique flavor profiles. I've made these sliders with a mix of beef and ground turkey for a lighter option, and they turned out fantastic! Just adjust the cooking time accordingly.
Variations & Customizations
Flavor Twists
Spicy Jalapeño
Mix in 1/2 cup diced pickled jalapeños and 1/4 cup diced red onion into the beef before forming the patties. The sliders will have a pleasureful kick, with a tangy crunch that pairs perfectly with the creamy cheddar.
BBQ Bacon
Add 1/2 cup cooked and crumbled bacon and 1/4 cup barbecue sauce into the beef mixture. The result is smoky and savory, with a sweet tang from the sauce that creates a delicious glaze.
Kid-Friendly
Cheesy Mac Sliders
Incorporate 1 cup of cooked macaroni and cheese into the beef mixture. The sliders become gooey and comforting, with a creamy texture that kids will love, making it feel like a fun twist on a classic.
Storage & Meal Prep
Room Temperature
Cheeseburger sliders can be left out at room temperature for up to 2 hours if covered with a clean kitchen towel or placed in a loosely covered container. Beyond that, they risk growing bacteria.
Refrigerator
In the refrigerator, they can last for 3 days. Make sure to let them cool completely, then wrap each slider individually in plastic wrap and store them in an airtight container to maintain freshness.
Freezer
You can freeze cheeseburger sliders for up to 2 months. I recommend flash freezing them on a sheet pan first, then wrapping each one tightly in foil or plastic wrap. Thaw them overnight in the fridge before reheating.
Meal Prep
For meal prep, I suggest doubling the recipe to have plenty on hand. Prepping the night before works best; simply store them in an airtight container in the fridge. They’ll stay fresh for up to 3 days, and when reheating, pop them in a 350°F oven for about 10-12 minutes until heated through.
Frequently Asked Questions
Can I use ground turkey instead of beef for cheeseburger sliders?
Yes, you can use ground turkey, but it may result in slightly drier sliders. To counter this, consider adding a bit of olive oil or shredded cheese to keep them moist.
Why did my cheeseburger sliders turn out dry?
Dry sliders usually come from overcooking the meat or using too lean of a beef blend. Stick with an 80/20 blend and cook them just until they’re no longer pink inside for the juiciest result.
What toppings can I add to my cheeseburger sliders?
You can get creative with toppings! Consider classic options like lettuce, tomato, and pickles, or try something unique like avocado slices or crispy fried onions.
How can I make cheeseburger sliders gluten-free?
To make them gluten-free, simply use gluten-free buns or lettuce wraps instead of traditional buns. Also, check any sauces or seasonings to ensure they’re gluten-free.
Can I prepare cheeseburger sliders ahead of time?
Absolutely! You can form the patties ahead and store them in the fridge for up to 24 hours before cooking. Just remember to let them rest at room temperature for about 15 minutes before cooking for even cooking.
These cheeseburger sliders are a hit at every gathering, and I love how easy they are to customize with your favorite toppings. For an extra touch of flavor, try adding a spoonful of your favorite barbecue sauce before grilling. I can't wait for you to give them a try—let me know how they turn out in the comments or share your creations on Pinterest!