
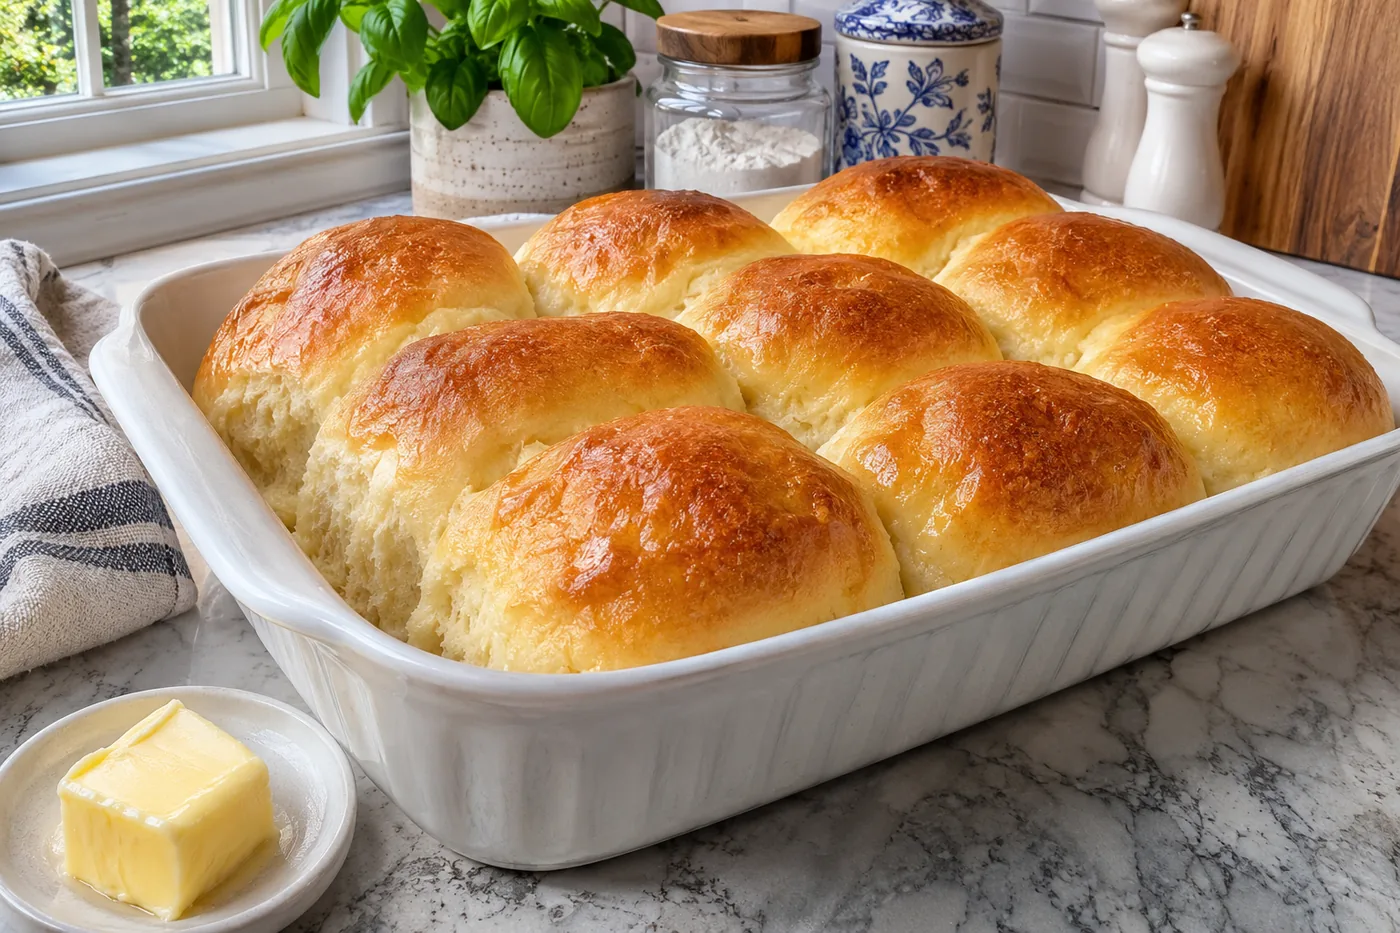
The first time I pulled a batch of homemade dinner rolls from the oven, the smell enveloped my kitchen, and my family gathered around, eager for a taste. These fluffy homemade dinner rolls are a great choice, transforming any meal into a special occasion with their buttery texture and warm aroma.
What sets this recipe apart is the addition of warm milk and melted butter, which creates a tender crumb and a golden crust that you just can't resist. Trust me, once you try them, you'll never settle for store-bought again!
Why This Recipe Works
- Yeast Activation: The instant yeast in this recipe allows for a quicker rise, making the dough more forgiving. I found that using warm milk at about 110°F helps activate the yeast effectively, resulting in airy, fluffy rolls.
- Butter Enrichment: Melted butter adds richness and flavor while also tenderizing the dough. I made a batch without the butter, and the texture was noticeably denser, lacking the soft, pillowy quality we all crave.
- Eggs for Structure: The addition of lightly beaten eggs contributes to the rolls' structure and moisture. I tested a version without eggs, and it resulted in a less cohesive dough that didn't rise as beautifully.
- Final Brush for Shine: Brushing the rolls with melted butter after baking gives them a glossy finish and enhances the aroma. I noticed that this small step truly enhances the presentation and makes them even more tempting.
Ingredients
What You'll Need
- 4 cups all-purpose flour essential for structure; look for unbleached flour for better flavor.
- 2 tbsp granulated sugar adds a touch of sweetness and helps with browning.
- 2 tsp instant yeast this helps the rolls rise quickly; check the expiration date for best results.
- 1 tsp salt enhances flavor; don't skip it!
- 1.5 cups warm milk (about 110°F) activates the yeast; make sure it's warm, not hot.
- 1/2 cup unsalted butter, melted adds richness and moisture to the rolls.
- 2 large eggs, lightly beaten provides binding and a tender crumb.
- 1 tbsp melted butter, for brushing on top gives a beautiful golden finish after baking.
When shopping for ingredients, choose high-quality butter and fresh yeast for the best flavor and texture in your homemade dinner rolls. The warm milk helps activate the yeast, so be sure to measure the temperature accurately to ensure a perfect rise.
Easy Substitutions
- Dairy-free: swap warm milk for almond or oat milk — the flavor will be slightly nuttier, but the rolls will still be soft.
- Gluten-free: swap all-purpose flour for a gluten-free flour blend — the texture may be a bit denser, but it will still be delicious.
- Egg-free: swap eggs for flaxseed meal mixed with water — expect a slightly denser texture, but it will bind well.
- Lower calorie: swap unsalted butter for applesauce — the rolls will be less rich, but still moist.
Step-by-Step Instructions
Prep & Mix
- In a large mixing bowl, combine 3 cups of all-purpose flour, 2 tablespoons of sugar, 1 packet of instant yeast, and 1 teaspoon of salt — this blend creates the foundation for your homemade dinner rolls.
- In a separate bowl, whisk together 1 cup of warm milk and 4 tablespoons of melted butter, then add 2 beaten eggs — this mixture will add moisture and richness to the dough.
- Pour the wet ingredients into the dry ingredients and mix until a sticky dough forms — the dough should come together but not be too dry or too wet, so adjust with a bit more flour if necessary.
Knead & Rise
- Knead the dough on a floured surface for about 8 minutes until it is smooth and elastic — this develops the gluten, which gives the rolls their wonderful texture.
- Place the dough in a greased bowl, cover it with a damp cloth, and let it rise in a warm place for about 1 hour or until it has doubled in size — this ensures your rolls will be fluffy and light.
- After the dough has risen, punch it down gently to release the air, then divide it into 12 equal pieces, shaping each into a smooth ball — this step helps create uniform rolls that bake evenly.
Shape & Bake
- Arrange the dough balls on a greased baking dish, cover them, and let rise for another 30 minutes — this final rise will make them nice and puffy before baking.
- Preheat your oven to 375°F and bake the rolls for 15-20 minutes, or until they are golden brown on top — you'll know they're ready when they smell tempting and sound hollow when tapped on the bottom.
- Remove the rolls from the oven and immediately brush the tops with melted butter for a beautiful finish — this adds flavor and enhances that golden color. Allow them to cool slightly before serving, so they’re warm and perfect for your meal.
Tips & Tricks
The Importance of Kneading
Kneading may seem simple, but it's crucial for developing the right texture. I always check for that smooth and elastic feel; if it’s too sticky, I add a sprinkle of flour. If your dough doesn't pass the windowpane test—when you stretch it, and it doesn’t tear—you might end up with dense rolls instead of fluffy ones.
Avoiding Overproofing
Timing is everything when it comes to letting your dough rise. If you leave it too long, the rolls can become overly airy and collapse during baking. I usually check them after the hour mark; they should be puffy but not double in size again. A gentle poke should leave a slight impression without springing back too quickly.
Pro Tips
- Control Dough Temperature: Keeping your ingredients at room temperature can make a big difference. Cold milk or butter can slow down yeast activation, leading to denser rolls. I always warm my milk to about 110°F for optimal yeast performance, ensuring fluffy results.
- Use a Kitchen Scale: Measuring flour by weight instead of cups leads to more consistent results. I invested in a kitchen scale, and it really helped me perfect the ratio. Flour can compact in cups, which might make your rolls too dry if you rely solely on volume.
- Steam for a Crusty Exterior: To get that beautiful crust on your rolls, create steam in the oven. I place a small pan of water on the bottom rack while baking. The steam helps give the rolls a lovely golden-brown crust and keeps them soft inside.
- Shape Evenly for Uniform Baking: When dividing the dough, aim for even weights for each piece. I use a bench scraper to cut the dough, which ensures each roll bakes at the same rate. This way, you won’t end up with some rolls overcooked while others are underdone.
- Brush with Butter Post-Baking: Brushing melted butter on your rolls right after they come out of the oven adds flavor and keeps them soft. I make it a habit to do this immediately; the aroma fills the kitchen and makes them tempting!
Variations & Customizations
Flavor Twists
Garlic Herb
Add 4 cloves of minced garlic and 2 tbsp of chopped fresh rosemary or thyme to the dough before the first rise. The result is aromatic, with a golden crust that’s crispy on the outside and soft on the inside, full of savory flavor.
Cheddar Jalapeño
Fold in 1 cup of shredded sharp cheddar cheese and 1-2 finely chopped jalapeños into the dough. These rolls come out with a pleasureful cheesy pull and a spicy kick, perfect for adding some excitement to your dinner table.
Kid-Friendly
Cinnamon Sugar
Mix 1/2 cup of granulated sugar with 2 tsp of ground cinnamon and sprinkle it into the dough before shaping the rolls. Brush the tops with melted butter and sprinkle more cinnamon sugar on top. The result is a sweet, fluffy roll that's reminiscent of a cinnamon roll, making it a hit with kids.
Chocolate Chip
Fold in ½ cup mini dark chocolate chips after mixing. The mini size melts into little pockets without sinking to the bottom. These rolls are a pleasureful surprise, with a sweet, gooey center that contrasts perfectly with the soft bread.
Storage & Meal Prep
Room Temperature
Store your homemade dinner rolls in an airtight container at room temperature for up to 2 days. If you stack them while still warm, they'll get soggy on the bottom, so let them cool completely before placing them in the container.
Refrigerator
In the refrigerator, they’ll last for about 4 days. Make sure to wrap them individually in plastic wrap or place them in a zip-top bag to keep them from drying out.
Freezer
For longer storage, freeze them for up to 3 months. Flash freeze them on a sheet pan first, then wrap each roll individually in plastic wrap and place them in a freezer-safe bag. Thaw them overnight in the refrigerator or at room temperature for a few hours before reheating.
Meal Prep
I recommend doubling the recipe for meal prep to have plenty on hand. You can make them the night before or on the weekend, and they'll stay fresh for up to 4 days in the fridge. Reheat in a 350°F oven for about 10-12 minutes to get that soft, warm texture back.
Frequently Asked Questions
Can I use whole wheat flour instead of all-purpose flour for homemade dinner rolls?
Yes, you can substitute whole wheat flour, but it will change the texture. The rolls may turn out denser, so consider mixing half whole wheat and half all-purpose flour for a lighter result.
Why did my homemade dinner rolls come out flat?
Flat dinner rolls can result from over-proofing or not enough yeast. Make sure to follow the rising times and check that your yeast is fresh for the best results.
Can I make homemade dinner rolls ahead of time?
Absolutely! You can prepare the dough and refrigerate it overnight before the final rise. Just let it sit at room temperature for about 30 minutes before baking.
What can I add to the dough for extra flavor?
Consider mixing in herbs like rosemary or thyme, or even cheese for a savory twist. You can also add a bit of honey or sugar for a touch of sweetness.
Are these dinner rolls suitable for a gluten-free diet?
To make gluten-free dinner rolls, you'll need to use a gluten-free flour blend and add xanthan gum for structure. The texture will differ, but they can still be delicious!
These homemade dinner rolls are a warm hug for your dinner table, filling your home with the most delightful aroma as they bake. For the best results, make sure to let them rise until doubled in size; it makes all the difference in texture. I can't wait to hear how yours turn out, so be sure to leave a comment or share your photos with me on Pinterest!