
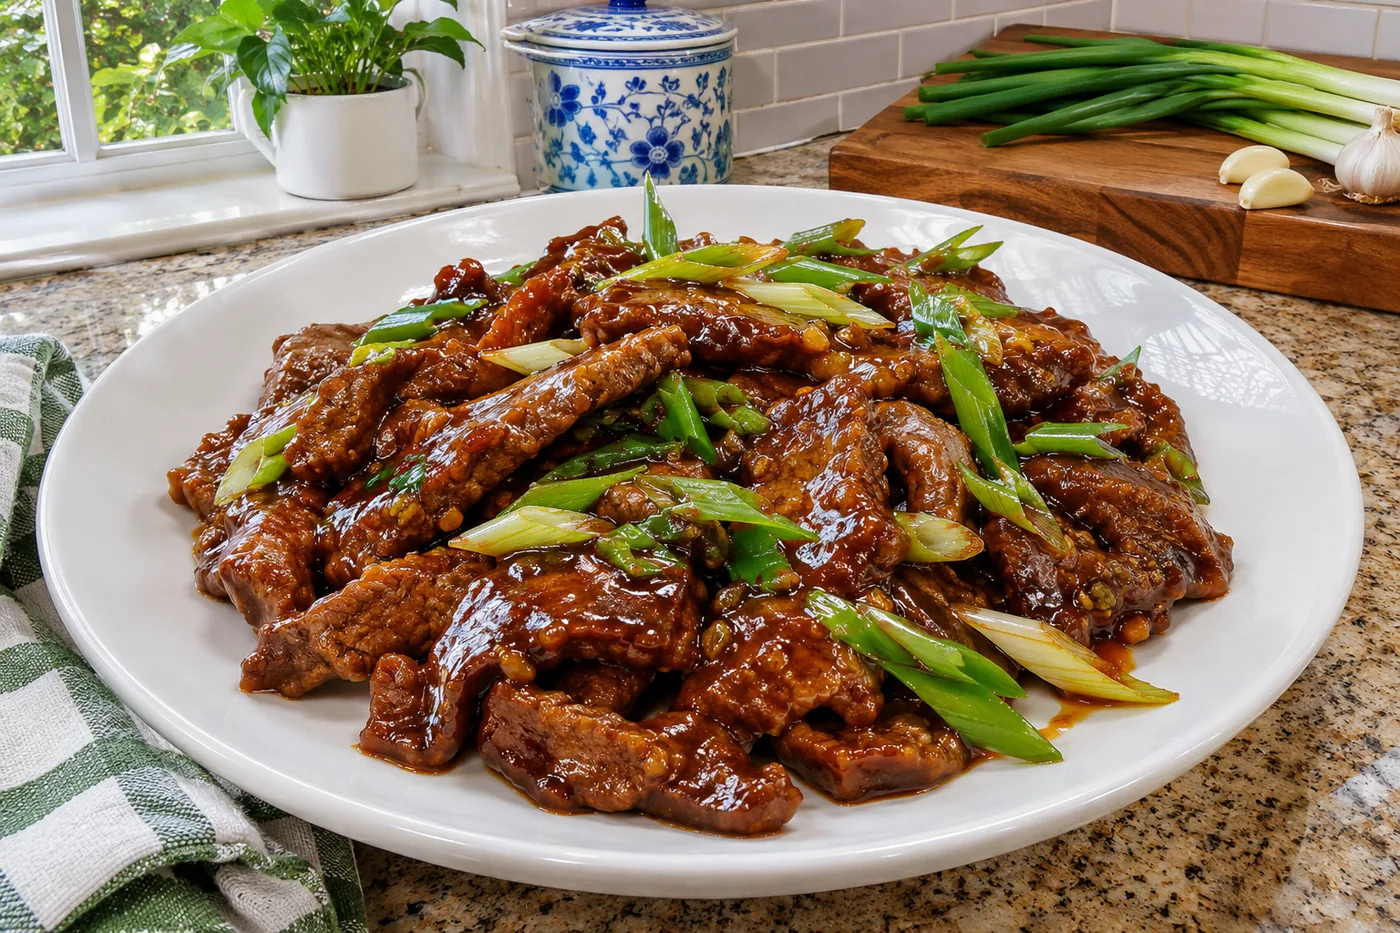
I remember the first time I made Mongolian beef for dinner; the aroma filled my kitchen, and my family couldn't resist coming back for seconds. It was a hit and made me realize that this simple stir-fry could be a weeknight favorite with just the right balance of savory and sweet flavors.
What sets this Mongolian beef recipe apart is the perfect blend of tender meat and a rich, glossy sauce that clings to every bite, making it a standout dish that’s ready in just 30 minutes.
Why This Recipe Works
- Tenderizing with Cornstarch: Coating the flank steak in cornstarch before cooking helps to tenderize the meat. The cornstarch forms a protective barrier during cooking, locking in moisture and ensuring a juicy bite. I made this recipe a few times and found that when I used a lighter coating, the beef was less tender than when I fully coated it.
- Flavor Balance with Soy Sauce and Sugar: The combination of low-sodium soy sauce and brown sugar creates a perfect flavor balance. The umami from the soy sauce enhances the beef while the brown sugar caramelizes during cooking, giving that tempting glossy finish. I experimented with different soy sauce brands and found that a low-sodium version allows for more control over the saltiness.
- Aromatics Enhance the Experience: Incorporating fresh garlic and ginger adds depth and complexity to the dish. These aromatics release essential oils when sautéed, infusing the beef with their vibrant flavors. I noticed that the dish truly came alive when I added the garlic and ginger at just the right moment, allowing them to become fragrant without burning.
- Sesame Oil for a Nutty Finish: Drizzling sesame oil at the end of cooking introduces a rich, nutty flavor that complements the dish beautifully. Sesame oil has a unique aroma that enhances the overall experience, making each bite more satisfying. I’ve tried skipping this step, and trust me, it’s simply not the same!
Ingredients
What You'll Need
- 1.5 lb flank steak sliced against the grain for tenderness; look for bright red color and minimal fat.
- 3 tbsp cornstarch coats the beef to create a crispy texture; essential for that signature Mongolian beef crunch.
- 2 tbsp vegetable oil for cooking; a high smoke point oil ensures a good sear.
- 3 cloves garlic minced for flavor; fresh garlic gives a pungent aroma that enhances the dish.
- 1 inch fresh ginger grated for warmth and spice; fresh ginger is more aromatic than dried.
- 1/2 cup low sodium soy sauce brings umami flavor without overwhelming saltiness; opt for low sodium to control salt.
- 1/4 cup brown sugar adds sweetness and caramelization; packed brown sugar contributes to the rich sauce.
- 1/4 cup beef broth enhances the sauce's depth; use low sodium to keep it balanced.
- 1 tbsp sesame oil adds a nutty flavor; use toasted sesame oil for a richer taste.
- 3 green onions sliced for garnish; fresh green onions add a pop of color and mild onion flavor.
- 1 tbsp sesame seeds for garnish; they add crunch and a nutty finish.
When picking out flank steak, ensure it's fresh with a bright red hue. The low sodium soy sauce keeps the dish flavorful without being overly salty, which is vital for balancing the sweetness of the brown sugar. Fresh ginger and garlic really enhance the dish, so opt for those over dried versions.
Easy Substitutions
- Dairy-free: there are no dairy ingredients in this recipe, so it’s naturally dairy-free.
- Gluten-free: swap low sodium soy sauce for tamari — result changes to a gluten-free option while maintaining the savory flavor.
- Lower calorie: swap brown sugar for a sugar substitute like monk fruit — result changes to a less sweet flavor, but it will still work in the sauce.
Step-by-Step Instructions
Prep & Coat
- 1. In a medium bowl, toss the flank steak strips with cornstarch until evenly coated — this helps create a crispy texture when cooked.
- 2. Heat 1 tablespoon of vegetable oil in a large skillet over medium-high heat (about 375°F). You'll know it's ready when the oil shimmers slightly.
- 3. Add the coated flank steak to the skillet in a single layer and cook for 2-3 minutes until browned, stirring occasionally for even cooking. The beef should sizzle as it hits the pan, forming a nice crust.
- 4. Remove the beef from the skillet and set aside on a plate to rest, allowing the juices to redistribute. This keeps it tender.
Sauce & Combine
- 1. In the same skillet, add the remaining tablespoon of vegetable oil, garlic, and ginger, and sauté for 1 minute until fragrant. You'll catch a pleasureful aromatic whiff as the garlic begins to brown.
- 2. Pour in the soy sauce, brown sugar, and beef broth, stirring to combine. Bring to a simmer for about 3 minutes — it should bubble gently, creating a glossy sauce.
- 3. Return the beef to the skillet and cook for an additional 2-3 minutes, stirring until the beef is coated with the sauce and heated through. The sauce should cling to the beef beautifully, making it glossy and inviting.
- 4. Drizzle with sesame oil and stir to combine, enhancing the flavor profile with a nutty aroma.
Serve
- 1. Remove from heat and garnish with sliced green onions and sesame seeds for a pop of color and crunch. They should look vibrant against the dark sauce.
- 2. Serve hot over steamed rice or noodles — the contrast of the warm beef and the soft, fluffy rice is so satisfying. Enjoy your homemade Mongolian beef!
Tips & Tricks
The Power of Marinade Time
Letting your beef marinate for at least 30 minutes is crucial. I usually do it for an hour or more when I have the time. The soy sauce and ginger not only infuse flavor but also help tenderize the meat, making it melt in your mouth. Rushing this step can leave you with tougher bites that just don’t do the dish justice.
Watch Your Cooking Temperature
Cooking at too high a temperature can lead to unevenly cooked beef. I’ve made that mistake before, and the results were chewy and dry. Aim for medium-high heat to get that lovely sear without overcooking the meat. You want a nice caramelization on the outside while keeping it juicy inside.
Pro Tips
- Use Flank Steak for Best Results: Flank steak has the perfect balance of tenderness and flavor for Mongolian beef. I’ve tried it with other cuts, but nothing compares to the way flank absorbs the marinade and cooks up beautifully.
- Slice Against the Grain: For melt-in-your-mouth beef, always slice against the grain. This technique shortens the muscle fibers, making each bite more tender. I learned this the hard way after a few chewy attempts!
- Double the Sauce: If you love a saucy dish, consider doubling the sauce ingredients. I’ve found that extra sauce not only enhances the flavor but also helps to coat the rice or noodles perfectly. Just make sure to adjust cooking times to avoid burning!
- Add Fresh Scallions at the End: For a pop of color and freshness, toss in sliced scallions right at the end of cooking. They add a crisp texture and enhance the overall flavor. I never skip this step; it makes a noticeable difference!
- Marinate Overnight for Maximum Flavor: If time allows, marinating the beef overnight develops a deeper flavor profile. I often prep this the night before, and the results are always worth the wait. Just remember to let it come to room temperature before cooking!
Variations & Customizations
Flavor Twists
Spicy Mongolian Beef
Add 1-2 tablespoons of sriracha and 1 tablespoon of rice vinegar to the sauce mixture. This version packs a punch with a fiery kick, balancing the sweetness of the brown sugar with a zesty heat that lingers pleasantly.
Citrus Infusion
Mix in the zest of 1 orange and 2 tablespoons of fresh orange juice to the beef broth. The result is a bright and refreshing twist, giving the dish a vibrant color and a tangy sweetness that complements the savory elements beautifully.
Unexpected Variations
Mongolian Beef Tacos
Use the Mongolian beef mixture as a filling for 8 small corn tortillas, adding 1/2 cup of shredded cabbage and 1/4 cup of diced mango for freshness. The combination of flavors creates a pleasureful fusion, with the crunchy cabbage and sweet mango enhancing the tender beef.
Storage & Meal Prep
Room Temperature
Mongolian beef can sit at room temperature for about 2 hours in an airtight container. After that, bacteria can start to grow, making it unsafe to eat.
Refrigerator
Store in an airtight container for up to 3 days. Be sure to let it cool completely before sealing to avoid condensation, which can make the beef soggy.
Freezer
It can be frozen for up to 2 months. For best results, flash freeze on a sheet pan before transferring to a freezer bag, removing as much air as possible. Thaw overnight in the refrigerator before reheating.
Meal Prep
I recommend doubling the recipe for meal prep; it’s a fantastic dish to have on hand. Prep it the night before and store in glass containers to keep it fresh. It will stay good for up to 3 days in the fridge. To reheat, microwave on high for about 2-3 minutes, stirring halfway through.
Frequently Asked Questions
Can I use a different cut of beef for Mongolian beef?
Yes, you can use sirloin or ribeye if you prefer. Just remember to slice it against the grain for tenderness, similar to flank steak.
What can I serve with Mongolian beef?
Mongolian beef pairs beautifully with steamed rice or fried rice to soak up the sauce. You can also serve it with stir-fried vegetables for added color and nutrition.
Why did my Mongolian beef turn out tough?
If your beef is tough, it might be due to not slicing it properly or overcooking it. Always slice against the grain and keep an eye on cooking time to maintain tenderness.
Is there a way to make Mongolian beef gluten-free?
Absolutely! Substitute soy sauce with tamari or a gluten-free soy sauce alternative. Ensure your cornstarch and any other sauces used are also gluten-free.
Can I make Mongolian beef ahead of time?
You can prepare the beef and sauce ahead of time, refrigerating them separately. Just reheat and combine when you're ready to serve for a quick dinner.
Mongolian beef is a deliciously satisfying dish that brings the warmth of home cooking straight to your table. For a little extra crunch, consider adding some roasted peanuts or sesame seeds just before serving. I'd love to hear how your version turns out, so be sure to leave a comment or share your creation on Pinterest!