
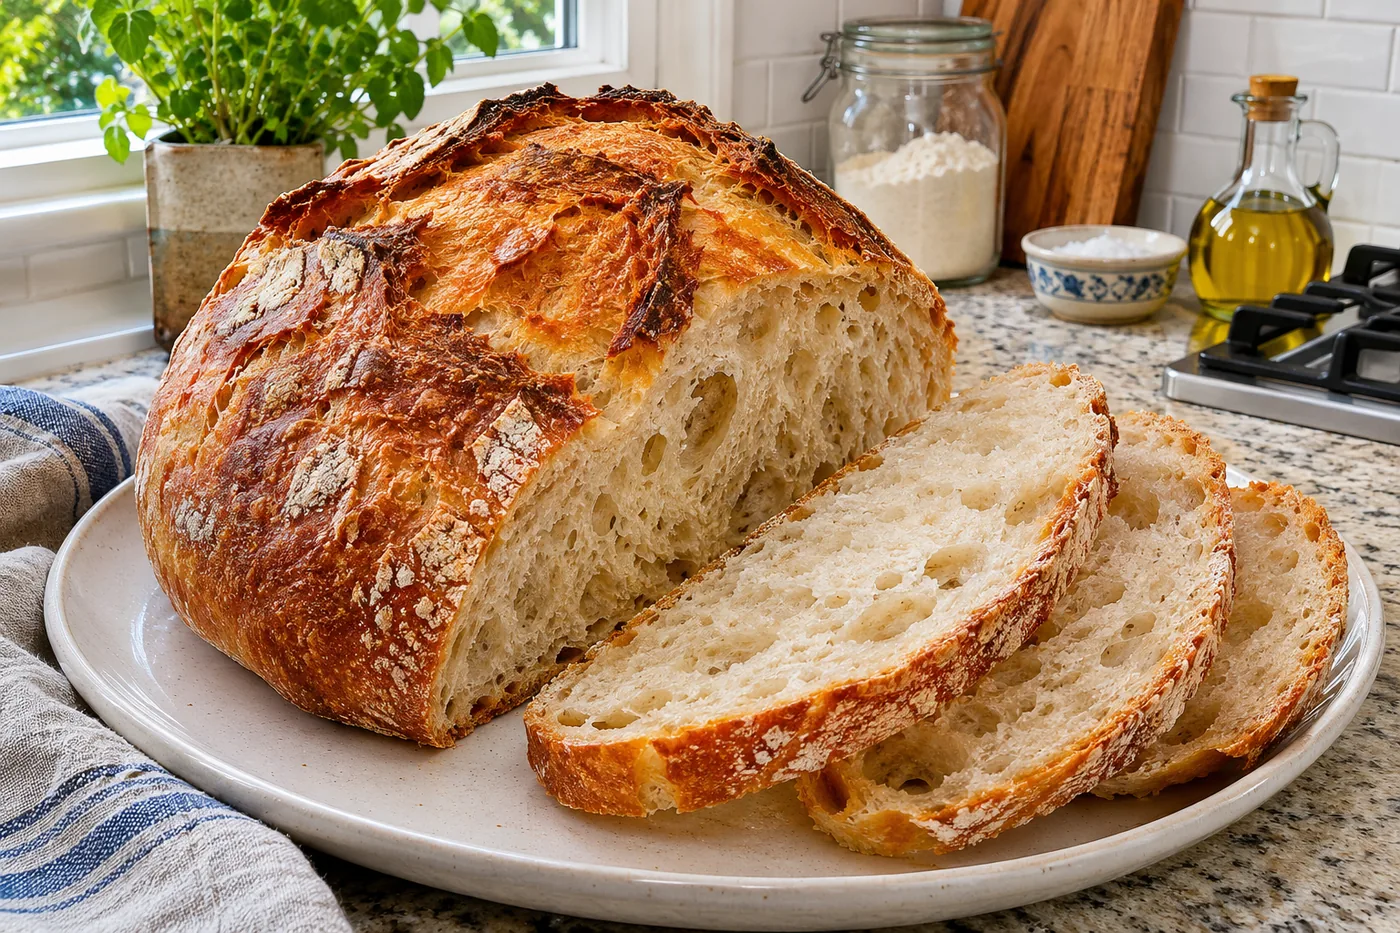
The first time I pulled a loaf of no knead bread from the oven, the aroma filled my kitchen and made my heart flutter. It had a golden, crispy crust and a soft, airy center that made every slice feel like a warm hug.
What sets this recipe apart is the perfect balance of simplicity and flavor — you don’t need to knead, and the long fermentation process develops a depth that’s simply tempting.
Why This Recipe Works
- Hydration Ratio: The high water ratio in this no knead bread recipe creates a wet dough, which results in a moist crumb and a beautifully open texture. I found that using exactly 1.5 cups of warm water was crucial for achieving that perfect airy structure.
- Long Fermentation: Allowing the dough to rest for 12-18 hours develops flavor and enhances gluten strength without any kneading. I tested shorter fermentation times, but the bread lacked the deep, complex flavor that a longer rise provides.
- Instant Yeast: Using instant yeast ensures a reliable rise with minimal effort, as it works quickly and effectively in a wet environment. I found that skipping the proofing step with instant yeast made the process even simpler while still yielding great results.
- Cornmeal Dusting: Dusting the baking surface with cornmeal prevents sticking and adds a pleasureful crunch to the crust. I tried using flour instead, but it didn’t provide the same satisfying texture contrast, which made me appreciate the cornmeal even more.
Ingredients
What You'll Need
- 3 cups all-purpose flour this gives the bread its structure and chewy texture; look for unbleached flour for a deeper flavor.
- 1 tsp instant yeast a fast-acting yeast that helps the dough rise without needing to be activated beforehand.
- 1.5 tsp salt enhances flavor and controls yeast activity; sea salt is a great option for better taste.
- 1.5 cups warm water should be around 100°F to activate the yeast without killing it; use a kitchen thermometer for accuracy.
- 1 tbsp olive oil greases the bowl to prevent sticking; extra virgin olive oil adds a lovely flavor.
- 1 tbsp cornmeal dusting the baking surface prevents sticking and adds subtle texture to the crust.
Step-by-Step Instructions
Prep & Mix
- In a large mixing bowl, whisk together 3 cups of all-purpose flour, 1/4 teaspoon of instant yeast, and 1 teaspoon of salt until well combined — this ensures an even distribution of the yeast and salt for proper fermentation.
- Add 1 1/2 cups of warm water to the dry ingredients and stir with a wooden spoon until a shaggy dough forms, about 30 seconds — this dough should look a bit messy, which is perfect for no knead bread!
- Cover the bowl tightly with plastic wrap or a kitchen towel and let it rise at room temperature for 12-18 hours — during this time, the dough will develop flavor and strength from the slow fermentation.
Bake
- After the dough has risen, preheat your oven to 450°F and place a Dutch oven (with the lid) inside to preheat for 30 minutes — this creates a steamy environment for crusty bread.
- Lightly flour a clean surface and turn the dough out onto it, sprinkling with additional flour to prevent sticking; it should be bubbly and puffy, indicating proper fermentation.
- Shape the dough gently into a ball, being careful not to deflate it too much, and place it on a sheet of parchment paper — this helps keep the dough from sticking when you transfer it later.
- Dust the top of the dough with cornmeal, cover it with a kitchen towel, and let it rest for 30 minutes — this resting time helps the dough relax and rise a bit more before baking.
- Carefully remove the preheated Dutch oven from the oven and lift the parchment with the dough into it — be cautious, as the pot will be very hot!
- Cover with the lid and bake for 30 minutes until the bread has risen beautifully.
- After 30 minutes, remove the lid and bake for an additional 15-20 minutes, or until the bread is golden brown and sounds hollow when tapped on the bottom — this indicates it's fully baked.
Cool & Serve
- Remove the bread from the Dutch oven and let it cool on a wire rack for at least 30 minutes before slicing — this cooling time allows the crumb to set properly, preventing a gummy texture when you cut into it.
- Once cooled, slice the bread and enjoy it warm with butter or your favorite spread — the crust should be crispy, while the inside is soft and airy, perfect for sandwiches or toast.
Tips & Tricks
The Importance of Dough Temperature
Make sure your water is warm but not too hot—aim for around 100°F. If it's too hot, it can kill the yeast, and we definitely don't want that! I usually test it with my finger; it should feel pleasantly warm, not scalding. This small detail helps the yeast activate properly, ensuring a good rise and flavor.
Avoid Over-Shaping the Dough
When you're shaping your dough, remember to be gentle. I’ve made the mistake of pressing too hard, thinking I was helping it take form, but that just flattened it. You want to keep as much air in the dough as possible for that lovely, airy texture. A light touch is all you need!
Pro Tips
- Use a Cast Iron Dutch Oven: The heavy cast iron holds heat exceptionally well, creating that perfect crust. I find that my bread rises beautifully and gets that coveted golden-brown crust when I use my favorite well-seasoned cast iron pot.
- Experiment with Flours: Try mixing in whole wheat or rye flour for a more complex flavor. I made a batch with half whole wheat, and the nutty taste was such a pleasureful surprise!
- Add Mix-Ins Before Rising: Incorporate herbs, cheese, or olives before the long rise for an infused flavor. I tossed in some rosemary and garlic, and the aroma wafting through my kitchen was wonderful!
- Use a Kitchen Scale for Precision: Measuring flour by weight ensures consistent results every time. I learned the hard way that my cups can vary, but a scale gives me confidence in the dough's hydration.
- Cool Completely Before Slicing: Allowing the bread to cool fully helps set the crumb, making it less gummy. I often get impatient, but waiting an hour makes a huge difference in texture!
Variations & Customizations
Flavor Twists
Herb Infusion
Add 2 tablespoons of finely chopped fresh rosemary or thyme to the dry ingredients. This bread will have a fragrant aroma and a pleasureful herbal flavor that complements savory dishes beautifully.
Cheesy Delight
Mix in 1 cup of shredded sharp cheddar cheese into the dough before the first rise. The result is a rich, savory loaf with gooey cheese pockets that ooze flavor in every bite.
Seasonal Versions
Pumpkin Spice
Incorporate 1 cup of canned pumpkin puree and 1 teaspoon of pumpkin pie spice into the wet ingredients. The bread takes on a warm orange hue and a cozy, spiced sweetness, perfect for fall.
Storage & Meal Prep
Room Temperature
Store your no knead bread at room temperature for up to 3 days in a paper bag or a bread box. This keeps the crust nice and crispy while preventing it from getting too humid. Just avoid plastic bags, as they can trap moisture and make the bread soggy.
Refrigerator
If you need to store it longer, wrap the bread completely in plastic wrap and place it in an airtight container in the refrigerator for up to 7 days. Make sure the bread is completely cool before wrapping, or they'll get soggy on the bottom if you stack them while still warm.
Freezer
For longer storage, wrap the bread tightly in foil or freezer-safe plastic wrap and freeze it for up to 3 months. I recommend flash freezing it on a sheet pan first to maintain its shape. To thaw, leave it at room temperature for a few hours, or pop it in a 350°F oven for 10-15 minutes to refresh the crust.
Meal Prep
Consider doubling the recipe if you love having fresh bread on hand. Prep it the night before or during the weekend, as it needs to rise overnight. Store it in a large container or wrap it in a kitchen towel. It will stay fresh for about 3 days at room temperature, and you can reheat slices in a 350°F oven for about 5 minutes.
Frequently Asked Questions
Can I use whole wheat flour instead of all-purpose flour?
Yes, you can substitute whole wheat flour for all-purpose flour, but the texture may change slightly. Whole wheat flour absorbs more water, so you might need to increase the hydration by adding a bit more water.
Why did my no knead bread come out dense?
A dense loaf can result from insufficient rising time or too much flour in the dough. Make sure your dough has enough time to rise and feels sticky to the touch before baking.
Can I add seeds or nuts to the dough?
Absolutely! Adding seeds like sunflower or sesame, or nuts such as walnuts, can enhance the flavor and texture. Just make sure to keep the total volume of additions around 1 cup to maintain the dough's consistency.
How long can I store no knead bread?
You can store no knead bread at room temperature for up to four days. If you want to keep it longer, slice it and freeze it in a sealed bag for up to three months.
Is there a gluten-free option for no knead bread?
Yes, you can use a gluten-free all-purpose flour blend designed for baking. Just expect some variation in texture and flavor, and make sure to check if the blend contains xanthan gum for better structure.
No knead bread is a great choice for busy days, delivering a crusty, golden loaf with minimal effort. For the best texture, let the dough rise longer, even overnight if you can. Give it a try, and I can't wait to hear how it turns out for you — leave a comment or share your creation!