
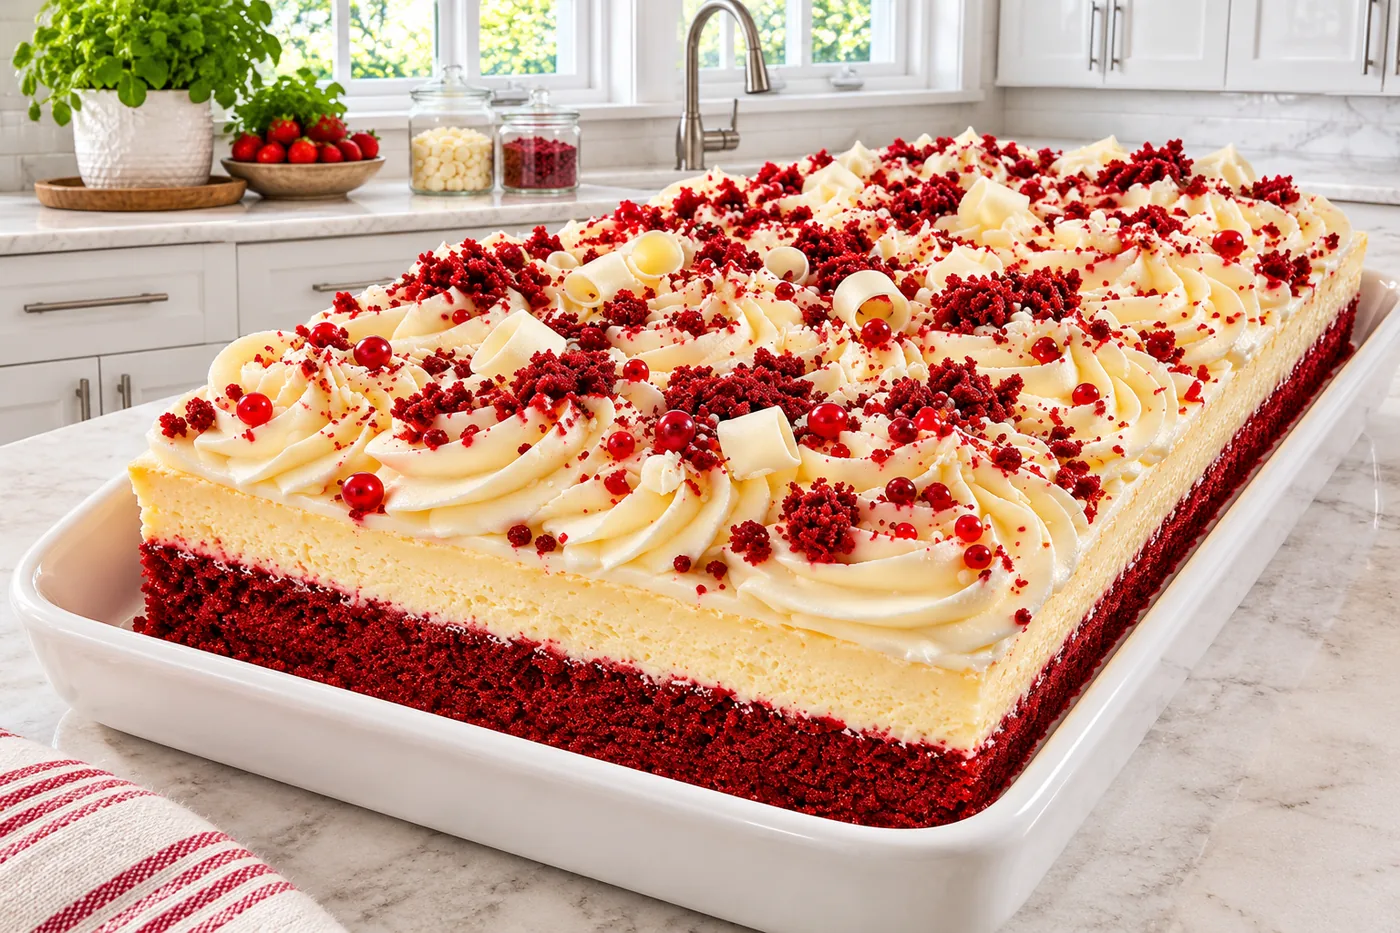
The first time I tasted red velvet cheesecake, I was at a friend's birthday party, and it was love at first bite. The creamy, tangy layers paired with that signature red hue left me dreaming of creating my own version.
What sets this red velvet cheesecake apart from the rest is the rich cream cheese frosting that perfectly balances the sweetness, making every slice a pleasureful indulgence.
Why This Recipe Works
- Cream Cheese's Role: The cream cheese serves as the base, providing a rich and creamy texture that balances perfectly with the tanginess of the sour cream. This combination creates a cheesecake that is both smooth and structurally sound.
- Sour Cream's Tang: Sour cream adds a pleasureful tanginess that cuts through the sweetness, enhancing the overall flavor profile. I found that using room temperature sour cream helps it blend smoothly, preventing any lumps.
- Red Food Coloring's Impact: The red food coloring not only gives the cheesecake its iconic hue but also enhances the visual appeal, making it a showstopper. When I tested with different brands, I noticed some colors were more vibrant, so choose wisely.
- Graham Cracker Crust Stability: The combination of graham cracker crumbs and melted butter creates a stable crust that holds up well under the creamy filling. I experimented with different ratios and found that 1:1 for crumbs to butter yields the perfect texture—crunchy yet not overly crumbly.
Ingredients
What You'll Need
- 2 cups cream cheese, softened makes the cheesecake rich and creamy; look for full-fat for best texture.
- 1 cup granulated sugar sweetens while balancing the tanginess of cream cheese; choose fine granulated for even mixing.
- 1 cup sour cream, room temperature adds a subtle tang and creaminess; let it sit out before using for smoother incorporation.
- 1 cup heavy cream, chilled whipped to create a light texture; choose high-fat heavy cream for the best results.
- 1 tbsp vanilla extract enhances the overall flavor profile; opt for pure vanilla for a more robust taste.
- 1 tbsp cocoa powder, unsweetened adds a slight chocolate flavor; use high-quality cocoa for depth.
- 1 tbsp red food coloring gives the signature red hue; gel coloring works best for vibrant color.
- 1 cup graham cracker crumbs forms the crust; choose finely crushed for a smooth base.
- 1/2 cup unsalted butter, melted binds the crumbs together; unsalted allows for better control of saltiness.
- 1/4 cup powdered sugar adds sweetness to the crust; sifted for a smoother blend.
- 1 tsp lemon juice balances sweetness with acidity; fresh lemon juice works best.
When making red velvet cheesecake, opt for full-fat cream cheese and heavy cream for the best, most rich texture. Look for high-quality cocoa powder and gel food coloring to achieve that vibrant hue and rich flavor that sets this dessert apart.
Easy Substitutions
- Dairy-free: swap cream cheese with dairy-free cream cheese — the texture will be less creamy but still holds together well.
- Gluten-free: swap graham cracker crumbs for gluten-free cookie crumbs — the crust will have a slightly different texture but will still be delicious.
- Lower calorie: swap heavy cream for whipped coconut cream — this will result in a lighter texture and a hint of coconut flavor.
Step-by-Step Instructions
Prep the Crust
- In a medium bowl, combine 1 ½ cups of graham cracker crumbs with ½ cup of melted butter. Mix until fully combined — this creates a rich, buttery base that holds everything together. You should see a sandy texture that's slightly moist.
- Press the crumb mixture firmly into the bottom of a 9-inch springform pan. Use the back of a measuring cup for even pressure — it’s important for the crust to be compact so it doesn't crumble when you slice the cheesecake.
Make the Cheesecake Filling
- In a large bowl, beat 24 ounces of softened cream cheese with 1 cup of granulated sugar using an electric mixer on medium speed for about 2 minutes until smooth and creamy — the mixture should be free of lumps for a silky texture.
- Add in 1 cup of sour cream, 1 teaspoon of vanilla extract, 2 tablespoons of cocoa powder, 1 tablespoon of red food coloring, and 1 tablespoon of lemon juice. Beat for an additional minute until well combined — this adds flavor and that signature red velvet color.
- In a separate bowl, whip 1 cup of heavy cream until soft peaks form, about 3-4 minutes. This will give your cheesecake a light and airy texture. Be careful not to over-whip, or it will become grainy.
- Gently fold the whipped cream into the cream cheese mixture until no white streaks remain. This step is crucial for achieving that fluffy consistency — use a spatula and be gentle, so you retain the air you've whipped in.
Assemble & Chill
- Pour the cheesecake filling over the prepared crust in the springform pan, smoothing the top with a spatula. Make sure it's even to ensure consistent slicing later — the filling should look smooth and creamy.
- Cover the springform pan tightly with plastic wrap and refrigerate for at least 4 hours, or until set. You’ll know it’s ready when the filling is firm to the touch — this chilling time is essential for the flavors to meld together.
- Once set, carefully remove the cheesecake from the springform pan. Dust the top with powdered sugar for a beautiful presentation — it adds a touch of sweetness and makes it look tempting before serving.
- Slice the cheesecake into wedges and serve chilled. Each bite should be a pleasureful combination of creamy cheesecake and subtle cocoa, just full of flavor.
Tips & Tricks
The Importance of Proper Cooling
Once your red velvet cheesecake is baked, let it cool in the pan for about an hour before transferring it to the fridge. I’ve made the mistake of rushing this step, and the cheesecake ended up cracking because it was still too warm. Cooling it slowly helps set the texture and prevents those unsightly cracks from forming, ensuring a beautiful presentation.
Choosing the Right Food Coloring
Not all red food coloring is created equal! I prefer using gel food coloring over liquid because it gives a vibrant hue without adding extra moisture. Liquid food coloring can sometimes alter the consistency of your cheesecake, making it too runny. Trust me, the gel variety gives that deep red color while keeping your batter just right.
Pro Tips
- Chill the Cream Cheese First: For an extra creamy texture, chill your cream cheese before mixing. I find that when it's slightly cooler, it blends more smoothly and helps prevent any lumps. Just pop it in the fridge for about 15-20 minutes before you start.
- Use Room Temperature Ingredients: Bring all your ingredients to room temperature before mixing. This ensures a more even batter and reduces the risk of overmixing, which can lead to a dense cheesecake. I’ve made this mistake before, and trust me, the texture is totally worth it.
- Add A Touch of Salt: Incorporate a pinch of salt into your cream cheese mixture. It enhances the sweetness of the cheesecake and balances the flavors beautifully. I always use fine sea salt for a subtle touch that doesn't overpower.
- Bake in a Water Bath: For a perfectly smooth surface, bake your cheesecake in a water bath. Just wrap your springform pan with foil to prevent leaks and place it in a larger pan filled with hot water. It’s a little extra work, but the results are so worth it.
- Let It Set Overnight: If you can wait, let your red velvet cheesecake set overnight in the fridge. This allows the flavors to meld and the texture to firm up beautifully. I’ve found that a day of patience makes all the difference in taste.
Variations & Customizations
Flavor Twists
Chocolate Hazelnut
Add ½ cup Nutella to the cream cheese mixture for a rich, chocolate hazelnut flavor. The cheesecake becomes creamier with a pleasureful nutty undertone, and the hazelnut aroma fills the kitchen as it bakes.
Berry Swirl
Incorporate 1 cup of mixed berry puree (strawberries, raspberries, and blueberries) into the cream cheese mixture, swirling it gently. This adds a vibrant color and a fresh, fruity taste that balances the richness of the cheesecake.
Unexpected Variations
Matcha Red Velvet
Blend 2 tablespoons matcha powder into the cream cheese mixture for a unique twist. The result is a stunning green and red marbled cheesecake that combines the earthy flavor of matcha with the sweetness of red velvet.
Storage & Meal Prep
Room Temperature
Red velvet cheesecake can be left at room temperature for about 2 hours if served, but it's best kept in an airtight container to prevent it from drying out.
Refrigerator
In the refrigerator, it stays fresh for up to 5 days. Make sure to let it cool completely before wrapping it tightly in plastic wrap or placing it in an airtight container to avoid any moisture build-up.
Freezer
You can freeze red velvet cheesecake for up to 3 months. The best method is to flash freeze slices on a sheet pan before wrapping each piece individually in plastic wrap and then placing them in a freezer bag. To thaw, simply transfer to the refrigerator for several hours or overnight.
Meal Prep
I recommend doubling the recipe if you want to have some on hand for later. Preparing it the night before allows the flavors to meld beautifully. Store in an airtight container, and it will stay fresh for up to 5 days. To reheat, warm individual slices in the microwave for about 30 seconds or until just warmed through.
Frequently Asked Questions
Can I use low-fat cream cheese for red velvet cheesecake?
Yes, you can use low-fat cream cheese, but it may affect the texture and creaminess slightly. The cheesecake might not be as rich, so I recommend using full-fat for the best results.
Why did my red velvet cheesecake crack on top?
A cracked top can happen if the cheesecake was baked at too high a temperature or if it was overbaked. To prevent this, bake at a lower temperature and avoid opening the oven door too frequently.
How can I make red velvet cheesecake gluten-free?
To make this cheesecake gluten-free, simply substitute the graham cracker crust with a gluten-free cookie option or almond flour. Just ensure that all your ingredients, including the food coloring, are labeled gluten-free.
What flavors pair well with red velvet cheesecake?
Cream cheese frosting is a classic, but vanilla ice cream or fresh berries also make delightful accompaniments. The tartness of berries can nicely balance the sweetness of the cheesecake.
Can I prepare red velvet cheesecake a day in advance?
Absolutely! In fact, making it a day ahead allows the flavors to meld beautifully. Just be sure to keep it covered in the refrigerator to maintain its freshness.
This red velvet cheesecake is a showstopper that never fails to impress at gatherings, and it’s so creamy, you’ll find yourself going back for seconds. For the best results, let it chill overnight; the flavors deepen beautifully, creating a dessert that’s truly memorable. I can’t wait for you to try it — let me know how yours turns out in the comments or share it on Pinterest!