
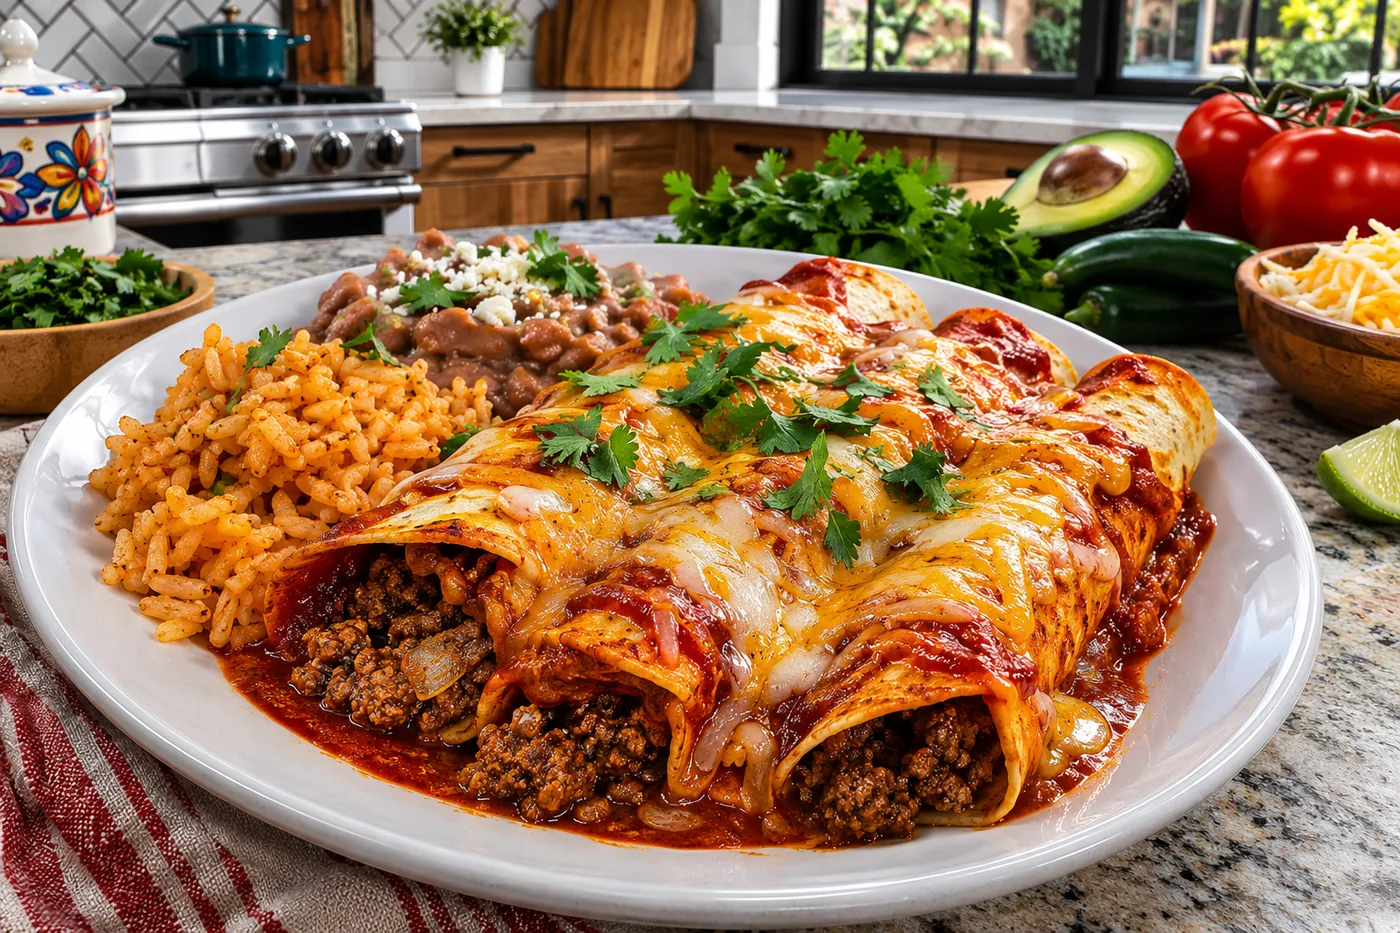
The first time I made beef enchiladas, I was overwhelmed by how quickly my family devoured them. They were so flavorful, with each bite full of spicy beef and cheesy goodness.
What sets this recipe apart is the perfect blend of seasonings and a secret ingredient that adds an unexpected depth of flavor, making it a standout dish on our table.
Why This Recipe Works
- Beef Fat Content: Using 80/20 ground beef provides the perfect balance of fat and flavor. The fat melts during cooking, keeping the meat juicy and ensuring the enchiladas are rich and satisfying.
- Tortilla Texture: Lightly warming the corn tortillas makes them pliable, preventing them from cracking when rolled. This step is crucial for a successful enchilada that holds together beautifully.
- Layering Flavors: The combination of cumin, chili powder, garlic powder, and onion powder adds depth to the beef filling. I experimented with different spice ratios and found that this mix creates a well-rounded flavor profile that complements the other ingredients.
- Cheese Melting Point: Choosing a blend of cheddar and Mexican cheese ensures a gooey, stretchy texture when melted. I tested various cheeses and found that the blend not only tastes great but also binds the filling, making each bite delightful.
Ingredients
What You'll Need
- 1 lb ground beef preferably 80/20 for flavor and juiciness in your beef enchiladas.
- 1 tsp cumin, ground adds a warm, earthy flavor that complements the beef.
- 1 tsp chili powder brings a mild heat and depth to the dish.
- 1 tsp garlic powder adds a savory punch without the fuss of fresh garlic.
- 1 tsp onion powder enhances the overall flavor profile with a subtle sweetness.
- 1 can refried beans, 15 oz creates a creamy texture and adds protein to the filling.
- 8 corn tortillas lightly warmed to prevent cracking when rolled.
- 2 cups shredded cheese, cheddar or Mexican blend melts beautifully and adds a rich, cheesy flavor.
- 1 cup salsa for filling and topping; choose your preferred heat level.
- 1 cup cooked rice optional, but adds bulk and helps stretch the filling.
- 1 cup sour cream for serving; adds a cool, creamy balance to the spices.
- 2 tbsp fresh cilantro, chopped for garnish; brightens up the dish with freshness.
When shopping for your ingredients, look for high-quality ground beef for the best flavor. A good melting cheese will make your enchiladas tempting. Don't forget to check the salsa; a homemade version can really enhance the dish.
Easy Substitutions
- Dairy-free: swap sour cream for cashew cream — the flavor will be less tangy, but you'll maintain a creamy texture.
- Gluten-free: swap corn tortillas for gluten-free tortillas — the texture will be slightly different, but they'll still hold the filling well.
- Lower calorie: swap ground beef for lean turkey — this will reduce the fat content but might make the filling a bit drier.
Step-by-Step Instructions
Prep & Cook Filling
- Preheat your oven to 375°F to ensure it’s ready for baking by the time you assemble the enchiladas. You want that perfect bubbling cheese!
- In a large skillet over medium heat, add the ground beef and cook for 7-10 minutes, breaking it apart with a spoon until it’s nicely browned. This step is crucial for developing flavor; brown meat creates those delicious caramelized bits.
- Stir in 1 teaspoon each of cumin, chili powder, garlic powder, and onion powder, cooking for an additional minute until fragrant. This will fill your kitchen with a warm, inviting aroma that makes your mouth water.
- Remove the skillet from heat, and mix in 1 can of refried beans and 1/2 cup of salsa until well combined. The beans add creaminess and help bind everything together.
Assemble & Bake
- Spread 1/4 cup of salsa on the bottom of a 9x13 inch baking dish. This helps prevent the enchiladas from sticking and adds moisture as they bake.
- Take a warmed tortilla, spoon 1/4 cup of the beef mixture onto the center, sprinkle with 2 tablespoons of cheese, roll it up tightly, and place it seam-side down in the baking dish. Make sure they fit snugly to keep them from falling apart during baking.
- Repeat with the remaining tortillas and filling until they’re all lined up in the dish. Visualize a cozy, cheesy rectangle — it’s so satisfying!
- Pour the remaining salsa over the top and sprinkle with the last of the cheese. This creates a delicious, melty topping that’s tempting.
- Cover the dish with aluminum foil and bake for 20 minutes. This steaming step keeps the enchiladas moist and helps the flavors meld beautifully.
- Remove the foil and bake for an additional 10 minutes until the cheese is bubbly and slightly golden. This gives you that lovely texture on top that you crave.
Cool & Serve
- Let the enchiladas cool for 5 minutes before serving. This will prevent the filling from spilling out and makes it easier to cut.
- Serve topped with sour cream and fresh cilantro for a touch of flavor and freshness. Enjoy your homemade beef enchiladas!
Tips & Tricks
Choosing the Right Tortillas
The type of tortilla you use can make a big difference in your beef enchiladas. I prefer corn tortillas for their authentic flavor and texture, but they can crack if they're too cold. To avoid this, lightly warm them in a dry skillet for about 30 seconds on each side. This makes them pliable and prevents those frustrating tears when you roll them up.
Cheese Choices Matter
Not all cheeses melt the same, so choosing the right one can enhance your enchiladas. I love using a blend of Monterey Jack and sharp cheddar for that perfect gooey texture and a flavor punch. If you want a little more kick, consider adding some pepper jack for a spicy twist. Just be sure to sprinkle a bit more on top before baking for that golden, bubbly finish.
Pro Tips
- Use Fresh Tortillas for Best Texture: Fresh tortillas create a soft and pliable base for your enchiladas. I often grab them from the local tortilleria; they hold up better during baking and have a wonderful flavor that adds depth to the dish.
- Layer Cheese for Even Melting: Instead of just sprinkling cheese on top, layer some inside the enchiladas as well. This little trick helps achieve that gooey, melty goodness throughout, rather than just a crusty topping.
- Add a Touch of Lime Juice: A squeeze of lime juice in the beef mixture can brighten the flavors. I learned this from a friend who swears by it, and it really enhances the overall taste profile without overpowering the dish.
- Make Your Salsa from Scratch: Homemade salsa is a great choice for enchiladas. I love using fresh tomatoes, cilantro, and a bit of jalapeño for heat; the freshness truly shines through compared to store-bought versions.
- Let Enchiladas Rest Before Serving: Allowing the enchiladas to rest for about 10 minutes after baking lets the flavors meld and makes them easier to cut and serve. Trust me, the wait is worth it for the perfect slice!
Variations & Customizations
Flavor Twists
Spicy Green Chile
Add 1 can (4 oz) diced green chiles to the beef mixture and top the enchiladas with 1 cup green salsa instead of red. The result is a zesty, vibrant dish with a kick that brightens the flavors beautifully.
BBQ Beef Enchiladas
Mix in ½ cup barbecue sauce with the cooked ground beef and refried beans. Top with 2 cups shredded pepper jack cheese. This variation introduces a sweet and smoky flavor profile, making each bite feel like a summertime cookout.
Kid-Friendly
Cheesy Bean Enchiladas
Replace the ground beef with 1 can (15 oz) black beans, rinsed and mashed, and add 1 cup of corn. Use 2 cups of mild cheddar cheese, and finish with a sprinkle of extra cheese on top. The result is creamy, cheesy, and less spicy, perfect for little taste buds.
Storage & Meal Prep
Room Temperature
Beef enchiladas can sit at room temperature for up to 2 hours in a covered dish. After that, they should be refrigerated to prevent any food safety issues.
Refrigerator
In the refrigerator, beef enchiladas will stay fresh for about 3-4 days. Store them in an airtight container, making sure they cool completely before sealing to avoid condensation. Wrapping them individually in foil can help maintain their texture.
Freezer
For freezing, beef enchiladas can last up to 2-3 months. I recommend flash freezing them on a sheet pan before wrapping individually in plastic wrap and then placing them in a freezer bag. To thaw, simply place them in the refrigerator overnight before reheating.
Meal Prep
Consider doubling the recipe for meal prep, especially if you love leftovers. Prep them the night before or over the weekend for easy weeknight dinners. Use glass containers with lids for easy reheating. They'll stay fresh in the fridge for about 3-4 days, and to reheat, pop them in a 350°F oven for about 20 minutes.
Frequently Asked Questions
Can I use a different type of meat for beef enchiladas?
Yes, you can substitute ground turkey or chicken for a lighter option. Just keep in mind that the flavor profile will change, so consider adding extra spices to enhance the taste.
Why did my beef enchiladas turn out dry?
Dry enchiladas usually result from overcooking or using leaner beef. Make sure to monitor the baking time and opt for 80/20 ground beef for added moisture.
How can I make beef enchiladas vegetarian?
You can replace the beef with a mix of black beans, mushrooms, and bell peppers for a hearty filling. Season them well with spices like cumin and chili powder to keep that delicious enchilada flavor.
What toppings work well with beef enchiladas?
Fresh toppings like diced tomatoes, avocado, and chopped cilantro brighten up the dish. A drizzle of sour cream or a sprinkle of cheese adds creaminess that complements the flavors beautifully.
Can I prepare beef enchiladas in advance?
Absolutely! You can assemble the enchiladas and store them in the fridge for up to 24 hours before baking. Just add a few extra minutes to the baking time if they go in cold.
Beef enchiladas are a true crowd-pleaser at my dinner table, filled with flavor and warmth that brings everyone together. For an extra kick, try adding some diced jalapeños to the filling for a pleasureful surprise. Give this recipe a go, and don’t forget to share your experience in the comments or save it for later on Pinterest!