
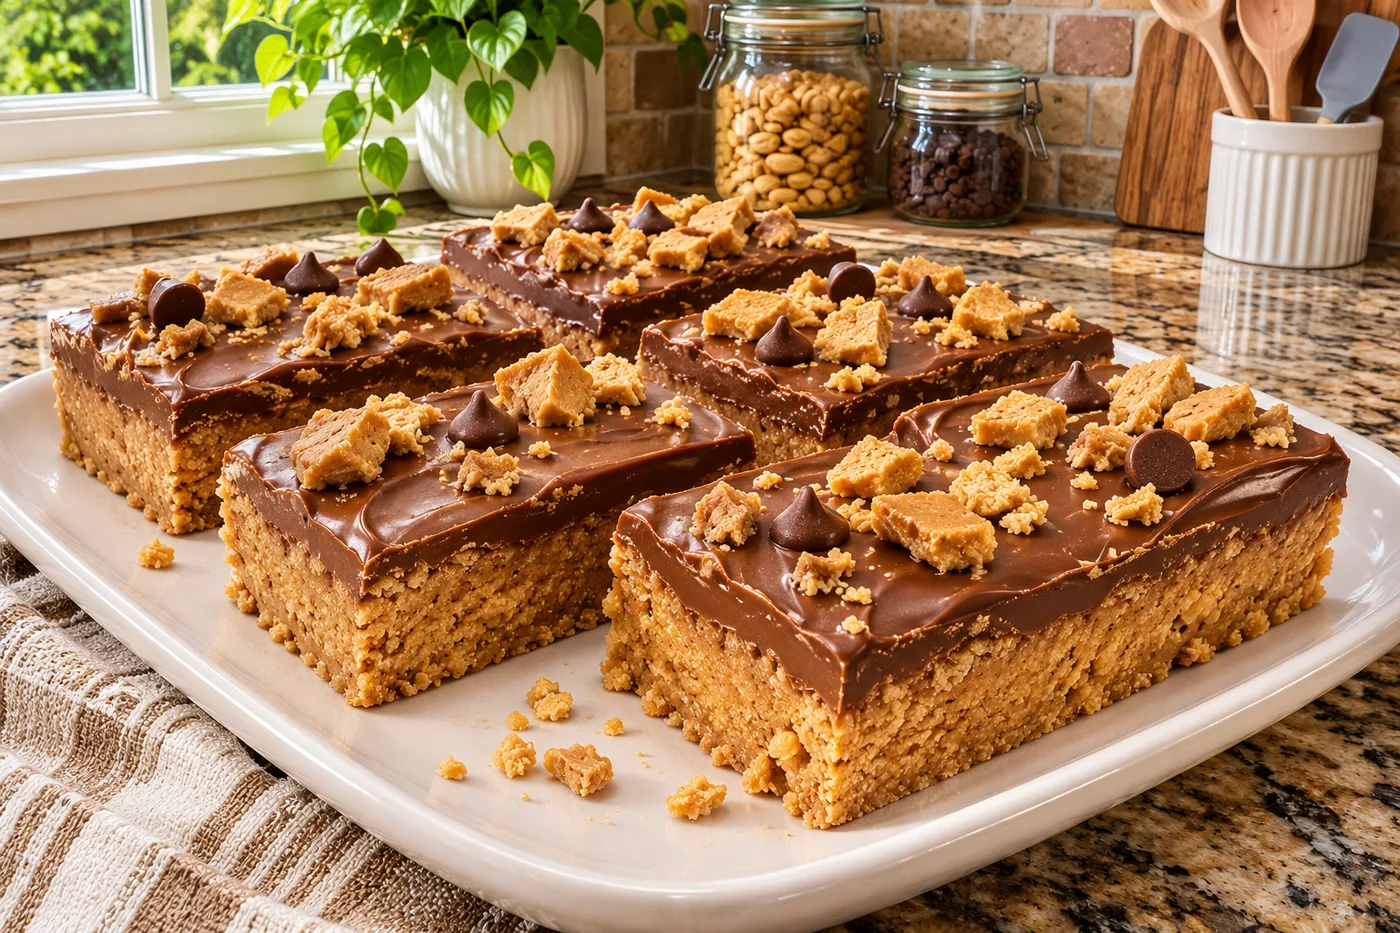
The moment I took my first bite of these no-bake peanut butter bars, I knew I had struck gold. The creamy texture and rich flavor instantly made me forget all those store-bought snacks that left me feeling guilty.
What sets this recipe apart is its use of natural ingredients, making it a wholesome treat you can feel good about indulging in. Plus, there’s no baking involved, which means less mess and more time to enjoy!
Why This Recipe Works
- Natural Peanut Butter Provides Creaminess: The natural oils in peanut butter create a rich, creamy texture that binds the ingredients together, making these no-bake peanut butter bars smooth and satisfying. I tried it with both creamy and crunchy varieties, and the creamy version gave a smooth mouthfeel that I absolutely loved.
- Honey Acts as a Binder: Honey not only sweetens but also acts as a binding agent, helping the bars hold their shape without the need for baking. I discovered that using maple syrup instead offered a slightly different flavor but worked just as well, keeping everything nicely held together.
- Coconut Oil Adds Healthy Fats: Melted coconut oil adds a subtle richness and helps solidify the bars once chilled, making them easy to slice. I experimented with different fats, but coconut oil provided the perfect balance of flavor and texture without overwhelming the peanut butter.
- Rolled Oats Contribute to Texture: Rolled oats give these bars a hearty texture and a bit of chewiness, making each bite satisfying. I found that using gluten-free oats didn't compromise the taste at all, so it’s a great option for anyone with dietary restrictions.
Ingredients
What You'll Need
- 1 cup natural peanut butter creamy or crunchy; choose a brand with minimal ingredients—just peanuts and salt for the best flavor.
- 1/2 cup honey or use maple syrup for a vegan option; honey adds natural sweetness and binds the bars together.
- 1/4 cup coconut oil melted; this helps with texture and provides a subtle coconut flavor.
- 1 tsp vanilla extract adds warmth and enhances the overall flavor profile.
- 1/2 cup rolled oats gluten-free if needed; they provide a chewy texture and help hold everything together.
- 1/4 cup chocolate chips optional; choose dark or semi-sweet for a rich contrast to the peanut butter.
- 1/4 cup chopped nuts optional; they add a nice crunch and additional protein.
- 1/4 tsp salt balances the sweetness and enhances the peanut flavor.
When picking peanut butter, I love brands like Skippy or Jif for creamy options, but natural varieties are great for a healthier choice. The honey not only sweetens but also acts as a binder, so don’t skip it! These no-bake peanut butter bars are perfect for satisfying sweet cravings without turning on the oven.
Easy Substitutions
- Dairy-free: swap honey for maple syrup — the bars will still be sweet, with a slight maple flavor.
- Gluten-free: use certified gluten-free oats — this ensures there’s no cross-contamination, keeping the bars safe for gluten-sensitive folks.
- Lower calorie: reduce the peanut butter to 3/4 cup and add an extra 1/4 cup of oats — the bars will be less rich but still delicious.
Step-by-Step Instructions
Prep & Mix
- In a large mixing bowl, combine 1 cup of peanut butter, 1/2 cup of honey, 1/4 cup of melted coconut oil, and 1 teaspoon of vanilla extract — these ingredients create a creamy base that holds everything together. Stir the mixture with a spatula until smooth and fully combined, about 2 minutes; it should look glossy and homogenous.
- Add 2 cups of rolled oats, 1/4 teaspoon of salt, 1/2 cup of chocolate chips, and 1/2 cup of chopped nuts to the bowl. Mixing in these ingredients not only adds texture but also flavor; stir until evenly distributed, about 1-2 minutes. You’ll want to see a good distribution of chocolate and nuts throughout the mixture.
Set & Serve
- Line an 8x8 inch baking dish with parchment paper to prevent sticking and make removal easier. This step is crucial for clean-cut bars later on. Transfer the mixture into the prepared baking dish and press it down firmly with the spatula; pressing firmly helps the bars hold their shape after setting, about 10-15 minutes.
- Refrigerate the bars for at least 15 minutes to set. After this time, they should feel firm to the touch and hold their shape when you press on them. Once set, remove the bars from the dish using the parchment paper, making sure to lift carefully to avoid breaking them.
- Cut into squares or bars of your desired size and serve. The bars should have a nice, chewy texture and a rich peanut butter aroma that fills your kitchen.
Tips & Tricks
Stick to the Right Peanut Butter
Using the right kind of peanut butter is crucial for these no-bake peanut butter bars. I recommend going for a natural peanut butter that has just peanuts and salt as its ingredients. Avoid the overly processed kinds that contain added sugars and oils; they can make your bars too sweet and oily. The texture will also suffer, leading to a bar that crumbles rather than holds together.
Chill for Optimal Texture
If you want your no-bake peanut butter bars to have that perfect chewy yet firm texture, don't skimp on the chilling time. I usually let them set in the refrigerator for at least 30 minutes rather than just 15. This extra time allows the coconut oil to solidify completely, making it easier to cut the bars into neat squares without them falling apart. Trust me, it's worth the wait!
Pro Tips
- Use Natural Peanut Butter Only: Go for the natural variety without added sugars or oils. It blends better and gives your bars a richer, more authentic peanut flavor. I made a batch with processed peanut butter, and the texture was way too oily!
- Experiment with Nut Butters: Feel free to mix it up! Almond or cashew butter can create a unique twist while still holding everything together. I once swapped half the peanut butter for almond butter and was blown away by the flavor.
- Add a Dash of Cinnamon: A pinch of cinnamon enhances the flavor profile beautifully. It adds warmth and complexity that complements the peanut butter perfectly. I sprinkle it in every batch now—it’s a little secret I can’t keep!
- Use a Food Processor: For a super smooth mixture, blend your ingredients in a food processor. It saves time and ensures everything is evenly mixed. Trust me, it’s worth the extra dish to avoid any clumps!
- Chill Longer for Better Texture: If you have the time, let the bars chill for a full hour. This extra time allows them to firm up even more, making them easier to cut. I’ve noticed that the extra chilling really pays off in texture!
Variations & Customizations
Flavor Twists
Chocolate Chip Delight
Fold in ½ cup mini dark chocolate chips after mixing. The mini size melts into little pockets without sinking to the bottom, creating a pleasureful contrast with the creamy peanut butter. You’ll love the sweet, gooey bites that balance perfectly with the salty peanut flavor.
Coconut Almond
Substitute ½ cup almond butter for the peanut butter and add ¼ cup shredded unsweetened coconut. This variation offers a tropical twist with a slightly chewy texture and a nutty aroma that transports you to a sunny beach.
Unexpected Surprises
Spicy Peanut Butter
Mix in ½ teaspoon cayenne pepper and ¼ teaspoon cinnamon to the base. The result is a surprisingly warm and spicy kick that complements the richness of the peanut butter. You’ll experience a pleasureful heat that lingers, making these bars a conversation starter!
Storage & Meal Prep
Room Temperature
No-bake peanut butter bars can be stored at room temperature for up to 3 days. Keep them in an airtight container to prevent them from drying out or becoming too soft.
Refrigerator
In the refrigerator, these bars stay fresh for up to a week. Use a container with a tight seal, and make sure to let them cool completely before wrapping them individually in parchment paper to avoid sticking.
Freezer
For longer storage, freeze the bars for up to 3 months. I recommend flash freezing them on a sheet pan first, then wrapping each one in plastic wrap. To thaw, simply place them in the fridge overnight.
Meal Prep
To make meal prep easier, consider doubling the recipe. Preparing them the night before works best, so you have delicious bars ready for the next day. Store in a container lined with parchment paper for easy access, and they’ll stay fresh for up to a week.
Frequently Asked Questions
Can I use a different nut butter for these no-bake peanut butter bars?
Yes, you can substitute almond or cashew butter! Just keep in mind that the flavor and texture will change slightly, but they’ll still be delicious.
What can I do if my no-bake peanut butter bars are too crumbly?
If your bars are too crumbly, try adding a touch more peanut butter or a bit of honey to help bind them together. Press them firmly into the pan to create better cohesion.
How can I make these no-bake peanut butter bars vegan?
To make these bars vegan, simply use maple syrup instead of honey for sweetness. Ensure your peanut butter is also vegan-friendly, which most natural types are.
What’s a good way to serve no-bake peanut butter bars?
I love serving these bars chilled, cut into squares, alongside fresh fruit or a drizzle of chocolate on top. They also make a great snack for kids!
Can I make these ahead of time for meal prep?
Absolutely! You can make these no-bake peanut butter bars a few days in advance. Just store them in an airtight container in the fridge, and they'll hold up beautifully.
These no-bake peanut butter bars are an absolute delight and perfect for satisfying your sweet tooth without turning on the oven. For an extra crunch, consider adding some chopped nuts or a sprinkle of sea salt on top before chilling. I can't wait to hear how yours turn out — try the recipe, leave a comment, or share a photo on Pinterest!