
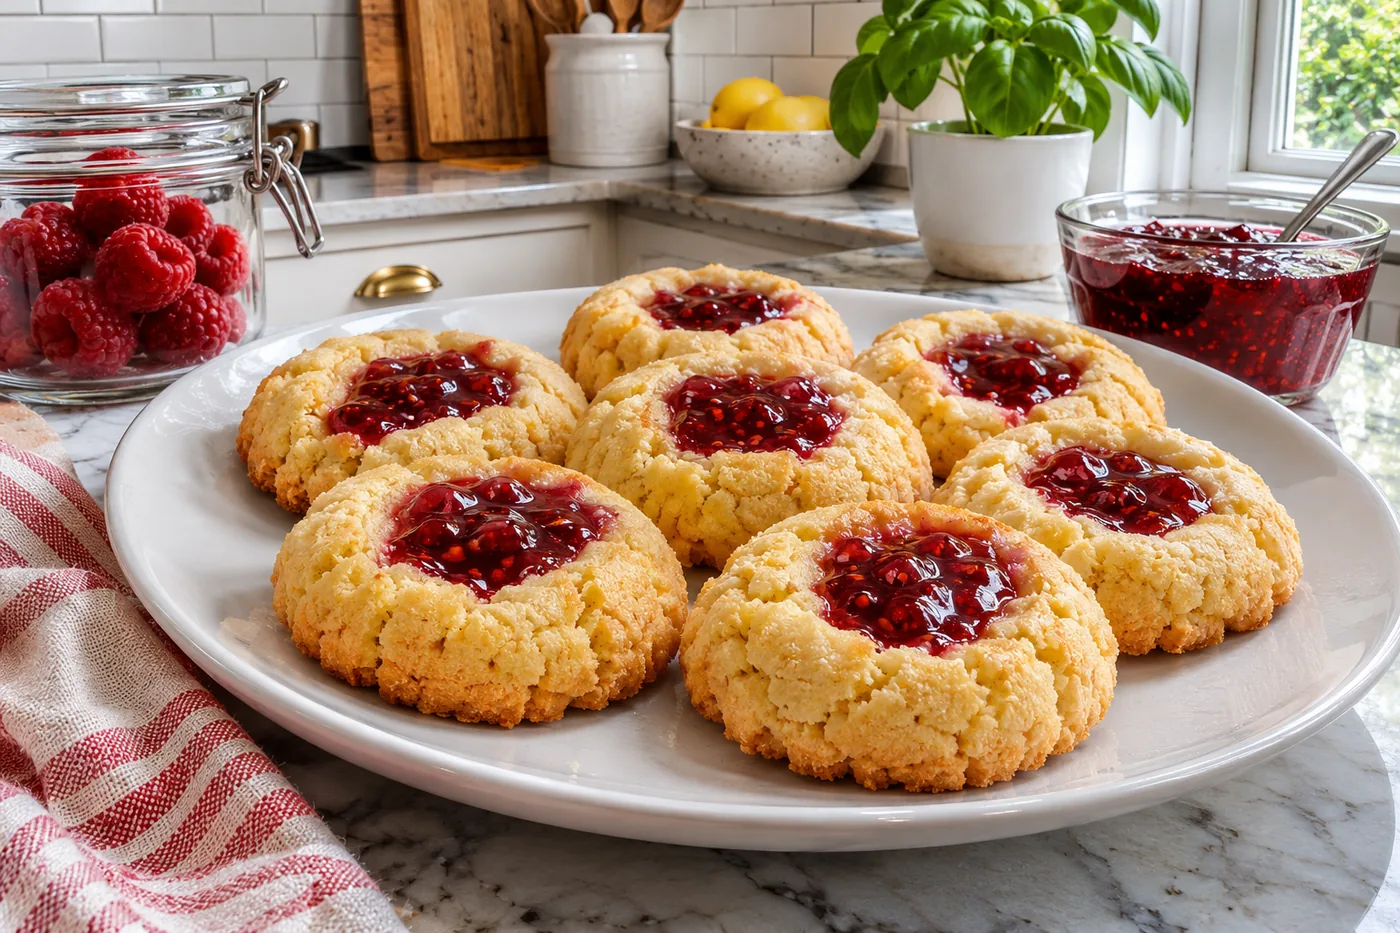
I remember the first time I bit into a thumbprint cookie — the buttery texture and the burst of fruit preserve were pure magic. I knew I had to recreate that moment at home, so I experimented until I found the perfect balance of flavors and textures.
What sets this recipe apart is the combination of a tender, melt-in-your-mouth cookie and a vibrant, tangy fruit preserve that adds a pleasureful surprise with every bite. Trust me, these thumbprint cookies will become your new favorite treat!
Why This Recipe Works
- Butter's Role: Using unsalted butter gives you control over the saltiness of your thumbprint cookies, allowing the sweet and fruity flavors to shine. The fat in the butter also helps create a tender, melt-in-your-mouth texture that’s essential for these cookies.
- Egg for Structure: The egg in this recipe not only provides moisture but also acts as a binder. It helps the cookies hold their shape while baking, ensuring that the thumbprint retains its distinct indentation, perfect for holding the fruit preserves.
- Baking Powder for Lift: Incorporating baking powder gives these cookies a lovely rise, creating a lighter texture. I found that using just the right amount prevents the cookies from becoming too dense, which is crucial for achieving that perfect balance.
- Preserves Add Flavor: Using fruit preserves not only provides a touch of flavor but also adds moisture to the center of each cookie. I experimented with different flavors and found raspberry gives a pleasureful tartness that complements the sweetness beautifully.
Ingredients
What You'll Need
- 1 cup unsalted butter, softened softened butter creates a creamy texture that helps the cookies spread evenly
- 1 cup granulated sugar adds sweetness and contributes to the cookie's crisp exterior
- 1 large egg binds the ingredients together, providing moisture and structure
- 2 tsp vanilla extract adds a warm, aromatic flavor that enhances the sweetness
- 2 cups all-purpose flour the main structure of the cookies; too much flour makes them dry
- 1 tsp baking powder helps the cookies rise and become light and airy
- 1/4 tsp salt balances the sweetness and enhances overall flavor
- 1/2 cup fruit preserves, such as raspberry or strawberry these add a pleasureful burst of flavor and moisture in the center
- 1/4 cup powdered sugar, for dusting adds a finishing touch of sweetness and a pretty presentation
When choosing fruit preserves, look for ones with real fruit and minimal added sugar for the best flavor. The quality of your butter and vanilla will greatly impact the final taste of these thumbprint cookies, so opt for high-quality brands if possible.
Easy Substitutions
- Dairy-free: swap unsalted butter for coconut oil — the cookies will have a slight coconut flavor and a different texture, becoming a bit more crumbly.
- Gluten-free: swap all-purpose flour for a gluten-free flour blend — the cookies will be denser and may not spread as much, but they'll still taste delicious.
- Egg-free: swap the egg for 1/4 cup unsweetened applesauce — this will keep the cookies moist but can make them slightly softer and less structured.
- Lower calorie: swap granulated sugar for a sugar substitute like erythritol — the sweetness will be similar, but the cookies may not brown as much.
Step-by-Step Instructions
Prep & Mix
- Preheat your oven to 350°F and line a baking sheet with parchment paper — this prevents the cookies from sticking and makes cleanup a breeze.
- In a large mixing bowl, cream together the softened butter and granulated sugar until light and fluffy, about 3 minutes — this aeration creates a tender texture in your thumbprint cookies.
- Add the egg and vanilla extract to the butter mixture, mixing until well combined — the egg adds richness, while the vanilla brings a warm aroma to the cookies.
- In a separate bowl, whisk together the all-purpose flour, baking powder, and salt — combining these dry ingredients ensures even distribution of the leavening agent for a perfect rise.
- Gradually add the dry ingredients to the wet ingredients, mixing until just combined — overmixing can lead to tough cookies, so stop when you see a few flour streaks.
Shape & Bake
- Using a tablespoon, scoop the cookie dough and roll it into balls, placing them on the prepared baking sheet about 2 inches apart — this spacing allows them to spread without merging together.
- Using your thumb, gently press down in the center of each cookie to create an indentation — this is where the fruit preserves will go, so make it good and deep.
- Fill each indentation with about 1/2 teaspoon of fruit preserves — this adds a touch of flavor and moisture to your thumbprint cookies.
- Bake in the preheated oven for 12-15 minutes, or until the edges are lightly golden — this visual cue ensures the cookies are baked just right, with a chewy center.
Cool & Serve
- Remove the cookies from the oven and let them cool on the baking sheet for 5 minutes — this helps them firm up a bit before transferring to a wire rack.
- Transfer to a wire rack to cool completely — letting them cool properly allows the flavors to meld together beautifully.
- Once cooled, dust with powdered sugar before serving — this adds a lovely touch of sweetness and makes your thumbprint cookies look tempting.
Tips & Tricks
The Perfect Thumbprint
Creating that signature thumbprint can be tricky! I found that using the back of a measuring spoon gives you a nice, even indentation without overworking the dough. Just be gentle when making the thumbprint; pressing too hard can cause the cookie to crack and lose its shape. Experimenting with different sizes of indentations can lead to unique variations, so have fun with it!
Choosing the Right Jam
Not all jams are created equal for thumbprint cookies! I love using homemade or high-quality fruit preserves because they have a thicker consistency and richer flavor. If the jam is too runny, it might leak out during baking, leaving you with a sad, flat cookie. For a fun twist, try mixing two flavors together — the color contrast is beautiful and adds a pleasureful surprise with every bite.
Pro Tips
- Chill Dough for Better Texture: Chilling the dough for at least 30 minutes before baking helps the cookies maintain their shape. I’ve found that this step also enhances the flavor, allowing the ingredients to meld together beautifully.
- Experiment with Fillings: Don’t limit yourself to traditional jam! Try using chocolate ganache or nut butters for a unique twist. I’ve made them with almond butter and it adds a pleasureful nutty flavor that pairs perfectly with the cookie.
- Use Fresh Ingredients for Flavor: Always opt for fresh butter and eggs. I once made a batch with older butter and the cookies came out flat and lacking that rich taste I crave. Fresh ingredients make all the difference.
- Sift Flour for Lightness: Sifting the flour before measuring can prevent clumping and lead to lighter cookies. I’ve noticed a significant difference in texture when I take the time to sift, resulting in a melt-in-your-mouth delight.
- Adjust Baking Time for Crispness: For a slightly crispier edge, bake the cookies for an extra minute or two. I usually keep a close eye on them towards the end, as the right amount of time can enhance the texture just right.
Variations & Customizations
Flavor Twists
Chocolate Hazelnut
Replace 1/2 cup of the granulated sugar with 1/2 cup of hazelnut spread and fold in 1/2 cup of chopped hazelnuts. The result is a rich, nutty cookie with a decadent chocolate flavor and a pleasureful crunch from the hazelnuts.
Lemon Blueberry
Add the zest of 1 lemon and fold in 1 cup of fresh blueberries. These cookies burst with a bright, citrusy flavor and look stunning with the vibrant blueberries peeking through the thumbprint.
Seasonal Versions
Pumpkin Spice
Substitute 1/2 cup of the flour with 1/2 cup of pumpkin puree and add 1 tsp of pumpkin pie spice. The cookies become soft and chewy with a warm, spiced aroma, perfect for autumn gatherings.
Storage & Meal Prep
Room Temperature
Thumbprint cookies can be stored at room temperature for up to 5 days in an airtight container. Make sure to keep them in a single layer to prevent the jam from sticking to the lid or other cookies.
Refrigerator
In the refrigerator, these cookies will stay fresh for about a week. Let them cool completely, then place them in a shallow container lined with parchment paper, layering them with more parchment in between to avoid sticking.
Freezer
You can freeze thumbprint cookies for up to 3 months. I recommend flash freezing them on a sheet pan for a couple of hours before wrapping each cookie individually in plastic wrap. To thaw, just leave them at room temperature for about 30 minutes before enjoying.
Meal Prep
For meal prep, I suggest doubling the recipe to have a nice stash on hand. You can bake them the night before or even on the weekend for easy treats during the week. Store in an airtight container, and they'll stay fresh for about a week. To enjoy them warm, pop them in a 300°F oven for 5-7 minutes.
Frequently Asked Questions
Can I use margarine instead of butter for thumbprint cookies?
Yes, you can use margarine, but it may alter the texture slightly. Butter provides a richer flavor and a creamier consistency that margarine might not replicate.
Why did my thumbprint cookies spread too much?
If your thumbprint cookies spread excessively, it could be due to the butter being too warm or not chilling the dough. Make sure to chill the dough for at least 30 minutes before baking to help maintain their shape.
What can I use instead of jam for the filling?
You can use chocolate ganache, peanut butter, or lemon curd as tasty alternatives to jam. Each option brings its own unique flavor and complements the buttery cookie beautifully.
How do I make thumbprint cookies gluten-free?
To make gluten-free thumbprint cookies, substitute regular flour with a 1:1 gluten-free flour blend. Ensure the blend contains xanthan gum to help with binding and texture.
Can I make the dough ahead of time?
Absolutely! You can prepare the dough and refrigerate it for up to 3 days before baking. Just let it sit at room temperature for a few minutes before shaping and baking.
These thumbprint cookies are a pleasureful way to bring a touch of nostalgia into your kitchen — they remind me of the cozy afternoons spent baking with my grandma. For a fun twist, try using different jams or even chocolate ganache for the centers. I can't wait for you to try them, so be sure to leave a comment about how yours turn out or share your favorite jam choice on Pinterest!